Monday, September 12, 2016

Supermarine Spitfire Mk Vb, Tamiya Kit No. 33 in 1/48th Scale

This kit has been in my stash since the 1990’s along with Aeromaster Decal Sheet 48-363 — The Eagle Squadron, Pt. 1 - purchased about the same time.  That of course means the decal sheet in the kit and the Aeromaster sheet are old enough to vote!

Unfortunately - or fortunately depending on how you look at it - I have a fair number of decals still in kits as well as aftermarket decals that are getting old enough to be of doubtful quality. That means I must test each sheet I am going to use by picking a decal I am not going to use on a model, dipping it in water, and applying it to a “paint dummy” model.  My “paint dummies” are models I was not going to build for display for whatever reason.  I have assembled the major parts, and I use them to try new paints and paint schemes, and I use them to apply decals to see if they are still viable.  After I am done, they are sprayed again with Vallejo Surface Primer and await their next “mission”.

Before I proceeded too far with this Spitfire, I selected  a few decals from the Aeromaster sheet I was not going to use, and I applied them.  Luckily, they worked as one would hope.  So, construction went ahead as planned.


https://upload.wikimedia.org/wikipedia/commons/thumb/3/33/Personnel_of_No.121_%28Eagle%29_Squadron_look_on_as_three_Spitfire_Vbs_come_in_to_land_at_RAF_Rochford_in_Essex%2C_after_a_fighter_sweep_over_northern_France_during_August_1942._D9509.jpg/640px-thumbnail.jpg 

I selected a machine from 121 Squadron.  Here is a photo of three 121 Squadron machines landing after a raid over occupied France.  The story of the Eagle Squadrons makes you proud to be an American.  Wikipedia has an excellent article on the Eagle Squadrons, which is where I found this photo.


Construction was uneventful.  The parts fit well, and the kit was engineered for ease of assembly.  No surprises and nothing to complain about.

I’ll mention four products used in the build:

1.  All the paints are Vallejo Surface Primer and Vallejo Model Air top coat colors.

2.  The antenna wire is from Fly Line.  It is a light, elastic thread.  I glue the thread with Testors clear parts glue.  Fly Line is my first choice in 1/48th scale.

3.  The seat is an Ultracast Spitfire Seat with Seat Belts molded in.  These seats are excellent and make any cockpit look better.  The Tamiya seat was fine, but there were no seat belts except, I think, decal seat belts, which were okay in the 1990’s, but not today.

4.  Lastly, I masked the camouflage scheme with Silly Putty.  I looked in several toy stores for the stuff, but nobody carried it.  Thank goodness for Amazon Prime.  They had it and sent me a large supply for $6.00.  Using this as masking material gives you a hard demarcation line but no “ridge” like you get with masking tape.  And, it is far easier to use.  It hugs all details and is easy to remove.  When done, just ball it up and put it back in the plastic egg for use next time.

Here are a number of photographs of the finished model.  It is not a contest winner, but none of my models are.  They are built for me to enjoy.  They are not built to impress some contest judge with a magnifying glass and and a mini flashlight.  


This is a nice relaxed and fairly quick build for modelers of all skill levels.  It has my unqualified recommendation.  Thank you for looking.


Sunday, September 11, 2016

Tamiya M4A3E8 Sherman "Easy Eight" in 1/35th Sacle

When the armor modelers rave about Tamiya kits (as do aircraft modelers), they are not wrong.  The detail and the engineering cannot be beat.  It is such a pleasure to spend one's time finishing and detailing a model and not fighting parts that don't fit or spending hours and dollars fitting after market items that should have been there in the first place.


Back in the 1980's and 90's, I built a number of Tamiya armor models, and I thought they were pretty good back then.  And they were for the time.  Some kits dated back to the 1970's and you could see how they were originally made to accommodate small electric motor drive systems.  But they were nice kits for the time.

However, they do not compare with this Easy Eight kit that came out last year.  The modern Tamiya armor kits are really superb.

The model is now fully assembled and ready for final painting.  (With US armor, you can have any color as long as it is olive drab.)  On this one, I am going to attempt some weathering and will add some after market details.


When I am finished, I will post some photos. 

Accurate Miniatures SBD-3 Douglas Dauntless Pt 2

 A few months ago, I posted about this model.  I finished it a month later, but I am just getting around to posting now.

It turned out rather well in my opinion.  Accurate Miniatures attempted to put on the market the most detailed kits of the subject in 1/48th scale.  It is too bad that they were only in business a few years, but in those few years they left us some really superb kits.


I chose the markings that came with the kit.  The machine depicted is an SBD-3 for VB-6 on the carrier Yorktown during the Battle of Midway.  If you go to Wikipedia and look up the Dauntless, there is a photo of this aircraft having landed back on Yorktown with battle damage. 


The paint is Vallejo Model Air which is my favorite.  I prime everything with surface primer before I put on the color coats.  This model was primed  with black and the color coats applied “thinly” giving it a subtle mottled effect.  That is the extent of the weathering.  The real aircraft was fairly well faded at the time of the Battle of Midway, but I chose not to try to duplicate that.


The dive brake flaps have the holes in them already.  I understand that Hasegawa 1/48th Dauntless does not.  It is one of the kew features of the aircraft.  They are depicted as they would be deployed for landing.


The kits comes with both single and twin .30 caliber machine guns for the observer/radio operator.  It is unclear from what I have read whether this aircraft had the twin mount or not.  They were added to the -3 models in the field by and large.  The aforementioned photo of this aircraft was taken with the aft gun/s stowed, so I don’t know.  Therefore, I opted for a single gun.


Since the aft canopies were frequently dispensed with, I do also.


I am a big fan of Ultracast seats.  They are beautifully cast, and they include the seat belt harnesses.  That silver “U” shaped object in the front cockpit is the wire cable harness used to suspend the Dauntless fro the ceiling of the hangar bay.  The Dauntless did not have folding wings, and hanging them up was a good way to store them.  It goes to show how much detail Accurate Miniatures put in these kits.  Hidden inside the aft cockpit is a detailed set of radios and a second set of flight controls.


The kit includes a 1,000 pound bomb and two 100 pound bombs.  The detail of the bomb mounts and landing gear is excellent.

The antenna is fine Easy Line I got from an Ebay merchant.  It is elastic thread, and it is very easy to use, much easier than stretched sprue.   And, it withstands some mild abuse.  I recommend it for 1/48th scale and larger models.


*****


This is the second Accurate Miniatures kit I have constructed.  It is such a shame that this company did not survive for very long.  The kits they did produce live on is re-issues by Italieri and Eduard.  This was a real pleasure to build, and I look forward to digging into my stash and building a few more AM kits.

Tuesday, August 9, 2016

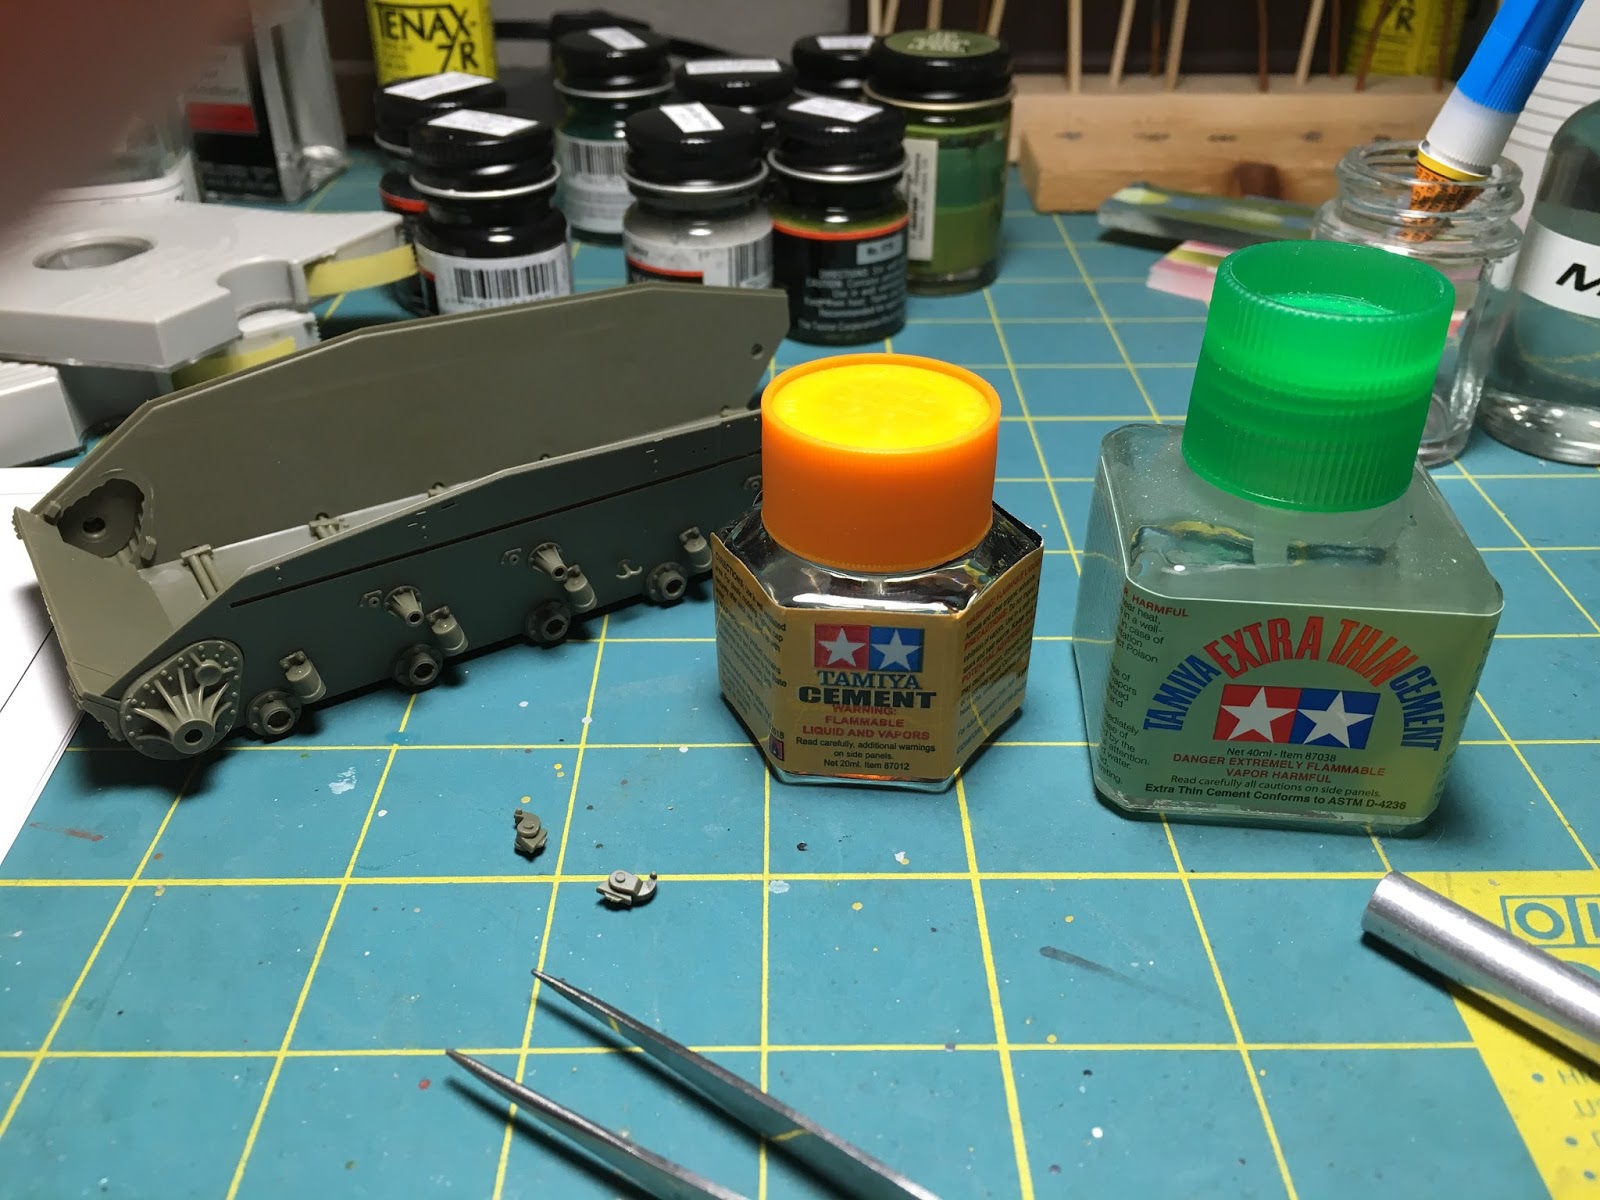
Tamiya Cement - Extra Thin and Regular

These products were being used by Andy at the Andy’s Hobby Headquarters channel on YouTube.  If you have not seen his videos, check them out.  I have linked his channel here.  It is mostly armor.  The videos are very professionally produced, and there is something to learn from each one.


Being curious about these cements, I picked some up.  Tamiya products always seem to be first-rate, and I use cement all the time.  I am currently using MEK as I did years ago.  And, it work well bonding.  It does have a tendency to really creep further than you think it will.  That makes it perfect for parts with long seams to seal like wing halves.  But it leaves something to be desired with small parts.  I apply it with a drafting pen.  If I need something thicker, I tend to use little tubes of thick CA that you can buy anywhere.  CA works great, but it is sometimes messy, will cloud clear parts and it really thickens up after the tube has been open for a week or two.

I have mentioned that I am getting back to building some armor.  My latest projects an AFV Club M24 Chaffee light tank.  There are about a million parts to be glued.  Many of them are very tiny.  Armor kits are generally fully assembled before any painting is done, so you spend a long time removing parts from the sprues, doing whatever cleanup is needed and then gluing them.

I decided to use these glues, and I could not be happier.  The thin cement (green cap) spreads itself along the mating surfaces with capillary action and does it in a well-controlled fashion.  The thicker cement (orange cap) cap be applied in tiny dabs where needed, and it does not evaporate so quickly that you do not have time to place the part where it belongs.

These cements are making the assembly of this model tank much, much easier.  I have a feeling they will be permanent additions to my workbench.


Monday, August 8, 2016

Tamiya 1/72d scale Zero - A Nearly Perfect Kit


This is the A6M3 Type 22 Zeke, Kit No. 85 in the Tamiya WWII aircraft series.

And it is as nearly a perfect kit as you will find.  The fit of the parts is right on.  I did not have to apply any putty anywhere.  The details are quite something in this small scale.  If it was scaled up to 1/48th scale, it would still be a great kit.

I have not made a Japanese aircraft in quite some years, and I was looking for a small, quick project.  This was in the stash, and I had all the colors I needed on hand.  So, out it came.

An Eduard canopy mask set was on hand also.  Those sets are worth the cost.  It obviates one of the un-fun chores with a model like this with so many windows and in 72nd scale too.

I added some surgical tape seatbelts, which look okay in this scale.  The kit decals went on perfectly using the Microscale system.

I have not added an antenna nor have I weathered it.  That will come soon.  I have just put together a homemade setup for photographing models, and I wanted to test it out.  The Zeke was done enough to put something up about it.  I still have a Tamiya Spitfire Vb, and Accurate Miniatures SBD-3 Dauntless and an Eduard Yak-3 that I have completed in the past few months.  I will be posting photos of them soon now that I have a better setup for taking photos.

Thank you for looking.


Sunday, July 3, 2016

Accurate Miniatures SBD-3 Douglas Dauntless Pt 1

My stash includes a number of Accurate Miniature kits, but I have only built one - their P-51 Allison engine Mustang armed with four 20mm cannons, which I built circa 1999 and is still in my built models collection.  It was a pleasure to build and produced a very nice model.

According to an entry on Wikipedia, the AM company filed for bankruptcy in 2003.  I know the molds are still around and still being used, at least some of them.

Whatever happened to the company, it is very sad that they did not continue in business.  Their kits are excellent, and in time the company could have become a real power house in the model world.  The kits live on for sale on eBay, and Italieri produces some of them.

This particular kit came into my possession in early 2000, when I bought it in a large, somewhat plain box mailed directly to me from AM, $36.00 post paid.  The box contained two complete SBD kits - one SBD-3 and one SBD-4.  The 3 has markings for a Dauntless that fought at Midway and the 4 for an Operation Torch Dauntless.  The box is rather large and contains a bunch of bagged sprues.  I sorted them all out, and I wonder if maybe you can make most of a third SBD from them.


The label says “Pre-Release Kit”, and maybe they intended that at the time.  I wonder if it was more that the company was awash with debt and was trying to raise some cash selling these models?  Who knows?  I know they were not around that long after I made this purchase.

As I said, there are a bunch of sprues to contend with.  I keep a cardboard box top/tray under my work table, and I use it to hold kit parts during construction.  I label the sprues in masking tape with their letter designation.  This keeps all the parts in one place if they fall off the sprues, and the labels make it really easy to find the part you are looking for during construction.


Not surprisingly, the construction starts with the cockpit.  No need for after market parts here.  The cockpit is very complete.  As usual, I primed with Vallejo Gray Surface Primer and then Vallejo Interior Green.  


Notice the little bottle on the upper right. The label says “MEK”, meaning Methyl Ethyl Ketone, a powerful paint remover and thinner for synthetic resins and coatings.  It is very volatile and should not be ingested.  However, it is very inexpensive (about $7/pint at Lowes or Home Depot) and will outlast 16 jars of Tenex 7R which costs about $7 per ounce.  I find that MEK flows better into joints and may flow further than an equivalent amount of Tenex 7R.  So, some care is needed.  In my opinion, MEK melts plastic more quickly and completely, especially when it has already been painted.


The cockpit floor includes lots of levers and detail.  Here it is partially primed.


The left and right side of the cockpit walls  appear below.  Rather than dry brush this area, I have used some Tamiya Weathering Master Dry Brush Effect material.  I am not quite done with the application yet.  I find this product easier to use than actual dry brushing and mistakes can be removed easily.


That is all the progress for now.  It looks like our hot Arizona summer is really getting under way (July is the hottest month here in Arizona).  So, I can see some more building time coming up.


(NB - If there are some spacing issues with this post, I am sorry.  I tries to get rid of the extra space between photos and text, but could not get it done.  Whether it was Google or my Mac, I do not know.)

Tuesday, June 28, 2016

Revell-Monogram B-25J Mitchell – WIP Part 7

The model was completed this weekend.  I am happy with the result.  Twelve pictures of the finished model are below.

These old kits can be something of a challenge, and much of the work is tedious.  Correcting parts for mold misalignment gets tedious.  Look, I said “tedious” twice.  I guess much of the project was…well…tedious at times.

However, if you want a B-25J in 1/48th scale, you have no other choice.  And the look of the finished model is rather good it terms of its shape and dimensions.  It sure looks like the B-25’s I have seen in a thousand pictures over the years.  So I am quite pleased with it.


The great Duke Ellington said, “If it sounds good, it IS good.”  That is how I feel about any model I see.  If it looks good to me, it IS good.  I feel this hobby is somewhat akin to art.  It is a matter of interpretation and making something that pleases the eye.


The endless “rivet counting” and other carping by Internet Experts just leaves me cold.  Sometimes they are right about this detail and that.  Those are the ones who quote an authority or source.  The ones that don’t cite anything are generally blowing so much smoke.


I am not saying that authenticity should not be a goal.  I research every model I build and strive to make the finished model look as much like the prototype as possible.  But when someone using some weird pseudonym posts some comment about how the intercooler grill has vertical fins and not horizontal fins and therefore the entire model should be smashed with a hammer, I seriously start to doubt the mental status of the writer.


The bottom line is that I am pleased enough with the B-25 that I am starting to wonder about the Monogram B-26 Marauder in 1/48th scale I have in my stash.  That would look nice on he shelf next to the B-25.  And what is a little filing, sanding and filling?


Thank you for looking and enjoy your modeling.