Monday, May 25, 2020

Tamiya, British Valentine Mk III Infantry Tank, 1/35 Scale , Kit No. MM352

A Valentine with passengers in the Western Desert circa 1942.  Public Domain photo.


In the 1930’s, armor doctrine in the British Army called for two types of tanks:  the fast cruiser tank and the heavier infantry tank.  The Valentine was the latter.  In 1938, the Vickers company proposed a new infantry tank based on Vickers’ own cruiser tank designs.  It was accepted and by Summer 1940, the tank was being deployed.  Also, a large number of Valentines were shipped to the USSR under Lend Lease for use by the Red Army.

Armament consisted of a main 2 pounder gun (40mm) with 60 rounds on board and a 7.92 mm Besa machine gun mounted coaxially with 3,150 rounds on board (and, yes, that is 7.92, not 7.62).  First combat was in November 1941 in Operation Crusader in North Africa as the British 8th Army under Field Marshall Montgomery took on Rommel and the German Africa Corps.  The last WWII combat was in May 1945 when Red Army Valentines entered Berlin with Soviet forces.

That is quite a record and makes the Valentine one of the important tanks developed in WWII although one of the lesser known ones.  (Above information from the “Background Information” pamphlet included with the kit.)

Oddly, no record remains as to the origin of the name Valentine.  One of the more senior officers involved with the new tank had a middle name of  Valentine, but that seems an unlikely source.  It may have been a project name attached to it at Vickers for security purposes and it stuck.  Who knows?  Everyone involved in it is gone now and in the urgency of world war, the source was not important enough to record.

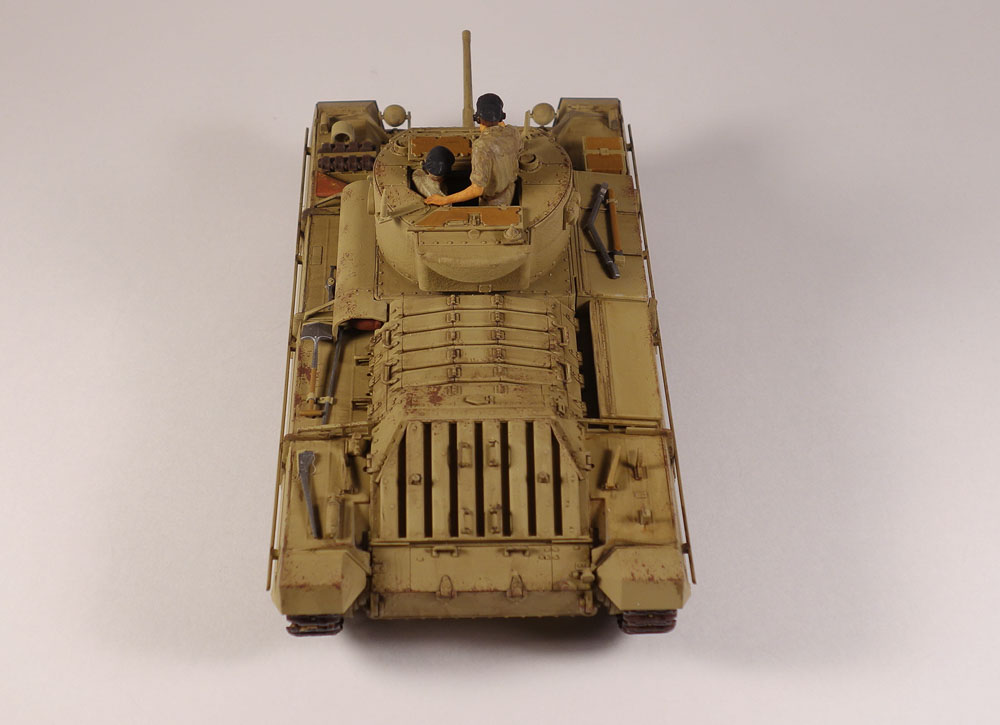
This kit was released for the first time in 2017, and it displays all the well-known aspects of Tamiya model kit engineering.  Two stand-out features to me are the link and length tracks, and the two figures of the commander and the loader, which are every bit as good as contemporary figures from there resin manufacturers.

Tamiya has a way of molding copious detail into the larger kit parts, such as the turret and hull, and then really extra fine detail is added with a few separate parts.  The Chinese kits tend to have 1,000+ parts which include tiny parts representing all those details Tamiya so expertly molded into the larger parts.  As I prefer to get the assembly done with  minimum of fuss so I can get to the painting and weathering, I definitely prefer the Tamiya approach.

The markings are for a Valentine from an Unknown British Army unit in North Africa during 1941-1942.  Markings for two Lend Lease tanks of the Soviet Army are also included in the kit.

The model went together with no real issues.  Very highly recommended.


I prefer to assemble and paint the tracks, wheels, etc.  before dealing with finishing the main part.
Particularly when there are sand skirts, as here, or fenders, it is very easy to mask the running gear with paper towels.


As always, thank you for visiting my blog.  Comments are welcome.


Monday, May 11, 2020

Hasegawa, P-47D Thunderbolt “Nose Art”, 1/48th Scale, Kit No. 09305 (Part IV)


The Thunderbolt needs little introduction.  It was a massive airplane for a fighter.  Fully loaded they could weigh upwards of eight tons and could carry a bomb load of 2,500 pounds.  Armed with eight .50 caliber machine guns, they packed a punch that could even sink ships the size of a destroyer, not to mention absolutely decimating armored columns and railroad trains.  The last Thunderbolts were retired in 1966 after serving in the Peruvian Air Force.

This model carries the markings of a fighter bomber squadron serving in Italy in 1944.  I configured it with a 500 pound bomb under each wing and no drop tank as tactical support missions were being flown at that time in Italy within reasonably short distances of U.S.Army Air Corps forward bases.

I have said all that there is to say about the build and finishing, so I will wrap this up by simply saying that these 1/48th scale Hasegawa kits have held up well over the past 20 years and are well worth building.


As always, thank you for visiting my blog.  Comments are always welcome.


Tuesday, May 5, 2020

Hasegawa, P-47D Thunderbolt “Nose Art”, 1/48th Scale, Kit No. 09305 (Part III)


In the last installment, I extolled the virtues of Vallejo Metal Color Airbrush Colors.  Vallejo says that they should be sealed with this product:

On previous models I used Microscale Micro Satin Clear Finish with good results over these Vallejo metal colors.  Micro Satin sealed the paint and the decals well enough that I was able to do some weathering with enamel based panel line paints.

In this case, I had two issues with this Gloss Varnish.  First, it takes a long time - several days - to dry unlike all other acrylic varnishes I have used.  Second, I used the Microscale system to apply the decals on this model.  I found that the Microscale solutions slightly softened the varnish making shifting the decal into position somewhat dicey if not done immediately.

That is a deal killer for me.  I will stick to using these metal colors in the future, but I will go back to my preferred sealing coat - Microscale Micro Satin.  Micro Satin gives me a realistic sheen, and it protects the underlying decals and paints from oil based paints and stains.  I intend to top coat this model with it.

Well, the decals are on thanks to an AeroMaster sheet I had in my collection, and I am close to getting it done.  And, thanks to the corona/Wuhan virus, I still have plenty of bench time.


As always, thank you for visiting my blog.  Comments are always welcome.


Sunday, May 3, 2020

Hasegawa, P-47D Thunderbolt “Nose Art”, 1/48th Scale, Kit No. 09305 (Part II)


The Thunderbolt project is coming along. In this segment, I want to deal with finishing.

I think most modelers avoid metallic finishes because they are so hard to apply and present so many problems.  (I admit I avoid them.  This Thunderbolt almost joined the RAF in India where they painted the airframes camouflage!)

Masking can be a nightmare as the metal finish comes right off with masking tape, even Tamiya tape with its minimal - but sufficient - grip.  Metallic finishes show every little flaw in the model’s surface.  And, they are very hard to apply so that they appear scale.

I have tried one product that seems to work okay, but it has some issues.  That product is the Vallejo Metal Color Airbrush Colors.  They airbrush easily and they stay put  when masked over with Tamiya tape. 


What’s not to love?  Well, the primer for one.  The gloss black primer sold with this line of paints is as hard to work with as the other Vallejo surface primers.  These primers are an acrylic-polyurethane product.  The stuff clings to the inside of my Grex airbrush, and after each use a thorough cleaning is necessary with airbrush cleaner followed by lacquer thinner.

Recently, I have been using Stynylrez surface primer.  It is a product of Badger Airbrush Co. and I highly recommend it.

Stynylrez is also an acrylic-polyurethane product.  However, it cleans up with airbrush cleaner followed by some lacquer thinner.  This primer has more of a satin finish than the Vallejo above which is gloss.  Frankly, I think Stynylrez would work with these metal paints.  I bought my Stynylrez on eBay in a three 2 oz. bottle pack of white, grey and black primer.  It provides an excellent paint base and you can use masking to your heart’s content.

After the metal color is applied, you should add a coat of gloss or satin varnish to protect the metal color while applying decals or using panel line paint or other weathering material.

These Vallejo Metal Color paints are a little expensive (aren’t they all?) but they get the job done.  I get mine at Spruebrothers.com.

Here I am using Tamiya masking tape and Post-It notes to mask a few panels on the Thunderbolt’s wings:
I outlined the area with thin strips of tape first, then finished with pieces of Post-It.


Picking out panels is fairly easy with these paints.
One of the handiest tools I have run across in years is the Infini Easycutting tool.  It is an  acrylic mat about 4” by 8”.  Laser-etched into the surface are straight lines from .4 to 1.0 mm wide.  You place a strip of masking tape down over the lines, and you can easily produce strips of tape in almost any width you can imagine.  All you need is a sharp #11 blade. 

It is so handy to be able to make thin strips of masking.  You can outline the area to be masked so much more easily with thin tape, and then you use wider tape to complete the masking with wider tape.  This is much easier than trying to use wide strips to start.

You will see brown area on the Infini on the photo below.  That is a piece of 3M Micropore bandaging tape.  I painted it khaki, and I cut 1.0 mm strips from it to make seatbelts for 1/72 scale airplanes.

Infini also makes at least two other Easycutting tools with circles and other shapes.


Well, it is on to decals, adding the bits and pieces, and a little weathering.  I will be back soon with the finished Thunderbolt.

 As always, thank you for visiting my blog.  Comments are always welcome.