Saturday, April 11, 2020

MPM, Gloster Meteor Mk I, 1/72, Kit No. 72567


This is the first and only Allied jet to enter operational serve e during WWII.  Clearly the British were miles ahead of the USA in jet  engine creation and manufacture.  The first American jets were powered with British engines.  While there was no jet-to-jet combat in WWII where the Meteor went up against the ME262, the Meteor Mk I effectively pursued and downed V-1 missiles over England.  There were teething problems to be sure, such as the cannons not being reliable and freezing at the wrong moment.  But the Meteor throughout its operational life proved to be a rugged, reliable and versatile aircraft.  Meteors downed Mig-15’s during the Korean War, and the Martin Baker Co. still has one flying as a testbed for new ejection seats.

If you want a Gloster Meteor Mk I in 1/72nd scale in your collection, this appears to be the only game in town for a readily available kit.  It is another product of Central Europe’s plastic kit powerhouse - the Czech Republic.

I do not know what the relationship is between MPM and Special Hobbies but they appear to be one and the same company, either through a name change or a merger.

According to Scalemates.com, the kit first appeared in 2006 as a Mk 9 Meteor.  This release was in 2011, and the kit includes many parts for other versions.  Releasing the Mk I was clearly an afterthought as many other marks were released first.

I found the part fit challenging in places, particularly the canopy.  As the kit fuselage was originally designed for later model canopy configurations, the Mk I canopy with its flat windshield was molded with a lip sticking out to cover that area of the fuselage that would be covered by the canopy in later marks.  I had the devil of a time trying to get it to fit, and I was not that successful. Once I broke the canopy on a 1/72nd model trying to make it fit, and I have since been very careful handling them.  As always, I blame myself and do not try to shift the blame to the manufacturer.  More skillful modelers have undoubtedly made it fit.

The each landing gear is made up of several parts that are a challenge to fit together correctly.  Instead of a straight oleo leg, the Brits designed the landing gear to flex at a knee joint.  I am no engineer, but this looked like another piece of British design that turned a 5 cent problem into a 50 cent solution.

Speaking of landing gear, I added 26 grams of lead birdshot in the nose and the engine nacelles to allow the model to sit on the landing gear.  The shot is placed in a convenient cavity (created with plastic card bulkheads where needed).  Then I pour Elmer’s wood glue over it to fix it in place as a single lump.  Never fails.

Main Colors Used (Vallejo Model Air):
    71.097  Base Grey (used for Dark Grey)
    71.022  Camouflage Green (used for Dark Green)
    71.049  Medium Sea Grey
    71.103  Grey (used for Sky)

Pros

Excellent subject.

Very nice decals for four versions, thin and easy to apply.

Cons
Fit could be better.

Cockpit could have been more detailed.

Mainer landing gear parts.  I am now using Tamiya Cement in most places I once used CA.  Given time to set and dry, this cement is very effective at keeping small parts fixed.

The lead shot is held in place by plastic card bulkheads I made along with Elmer's glue.


Sunday, April 5, 2020

Tamiya, M151A1 U.S. Utility Truck “Vietnam War”, 1/35 scale, Kit No. 35334

Aside from various types of 2 1/2 ton trucks, this is a vehicle I operated almost constantly while in the Army.  The all-purpose MUTT (military utility tactical truck).  They served in many roles.  With a quarter ton trailer behind them, quite a bit could be hauled.  They acted as scout vehicles, armored cars (with field conversions), ambulances, and weapons carriers, as well as simple troop transports.  And with the Davy Crockett short range nuclear armed ballistic missile mounted, the MUTT became a nuclear weapon! I always wondered if the missile would go far enough to keep from killing the crew firing it.

By the late 1980’s, the MUTT was being phased out of service.  Some  went to allied countries, but most were cut into two or four pieces and scrapped.  Really.  They were just destroyed.  I have never heard a real explanation for this, as they could have been sold to civilians.  There were some who believed that the fully independent suspension of the vehicle made them somehow too unsafe for civilian use (but apparently not armed forces use).  I think it was more that the Ford Motor Co. (the manufacturer), Jeep and others that wanted to sell new vehicles to us and wanted the competition to go into the scrapper’s compacter.

By the way, as I recall, these vehicles were always referred to with the term “jeep” and sometimes MUTT.

According to Scalemates.com, this kit was new tool on 1982, and it shows its age.   This version lets you built a U.S. Army Military Police or U.S.M.C. vehicle with fording kit, both with markings for Vietnam units.

While not called out for use on this version, there are parts for an M60 machine gun and a radio on the sprues, so I decided to use them.  The MP’s spent a lot of time guarding convoys, etc. and seeing the M60’s mounted on their vehicles was pretty common, as was radios being mounted on a huge proportion of the MUTTs.

The kit goes together very well with no issues.  There is a figure for a seated driver, so there are no pedals to get in the way of mounting him.

Pros

Nice quick build as a change of pace project.

Very desirable subject.

Cons

Nothing worth noting.


As I write this blog entry, here in the USA we are in the depths of the corona virus pandemic.  This is a small blog with a few followers, many of whom are from France, Russia and other places around the world that have also been deeply effected by the virus.  My thoughts are with my fellow modelers and their families all over the world, and my hope and wish that we all come through this as unscathed as possible.


 And, as always, thank you for visiting my blog.  Comments are always welcome.


Saturday, March 21, 2020

Tamiya, Ilyushin Shturmovik IL-2 Type 3, 1/72, Kit No. 60781

I was looking for a relatively simple project, and this kit 2013 release was in my stash.  Tamiya’s 1/72 scale aircraft are usually among the best in that scale one can buy.

The IL-2 was the Soviet AF’s famous “flying tank”.  This nickname was bestowed on it by the Germans who were amazed at the ability of the IL-2’s armor to shed small arms fire.

Stalin famously said this aircraft was as important to the military as bread and air for the soldiers.  In that same statement he expressed how upset he was at low IL-2 production.  Construction delays caused by constant improvements being added to the aircraft at the expense of production volume were the main cause.  Stalin sent a message that he wanted production increases pronto, and ended the note with “This is my final warning.”  With Stalin’s reputation for executing anyone who displeased him, this must have had a dramatic effect on the production volume as Wikipedia says that 36,183 were built between 1941 and 1945.

I decided to use the markings for an aircraft of the 16th VA which participated in the Battle for Berlin in April and May 1945 when the USSR smashed the living daylights out of what was left of the German army.

For the first time, I used Vallejo Matt Varnish 70.520 as a final coat, and I am very pleased.  I usually use Testor’s Dullcote, which works well.  But I had a bottle of the Vallejo and thought I would try it.   It dries fast and very flat.  And it sprays very easily with a little thinner added (Vallejo Airbrush Thinner 71.061 in this case).  The finish is smoother to the tough than Dullcote, and therefore I expect it will make listing easier.  I am very pleased with the product.

Multiple weapon loads are possible as bombs (2 sizes) and rockets are included.  However, the mounting tabs on the bombs and rockets are so badly designed that they might as well have not included them.

This is a nice kit, but the wing attachment and the weapons attachment points bring an excellent kit down to just an okay kit.  Too bad.  Unless you are an IL-2 fan, you might want to skip this one.  The engineering on this kit was a bit odd considering the high standards set by Tamiya.

Anyone who has followed my blog knows I am a fan of Tamiya kits.  My criticism of the IL-2 kit  has its reasons.  This is a kit released only seven years ago, not some re-pop of a kit from the 1970’s and therefore should be judged by much higher standards.

Pros

Main gear doors have good sized tabs to mount them to the airframe.  This is one of my common kit gripes, i.e., no provision to mount landing gear doors so they fall off with the slightest touch, like when you dust the model.

Interesting subject with markings for three aircraft.

Cons

Odd seam where the wing mounts to the fuselage making a clean fit somewhat tricky.  It is not clear why they engineered it this way.

There is no provision for an open front cockpit canopy, which makes it hard to see the details of the cockpit which are very nice even in this scale.

Also, see above.
The odd fuselage to wing joint can be seen here.


 As always, thank you for visiting my blog.  Comments are always welcome.

Sunday, February 2, 2020

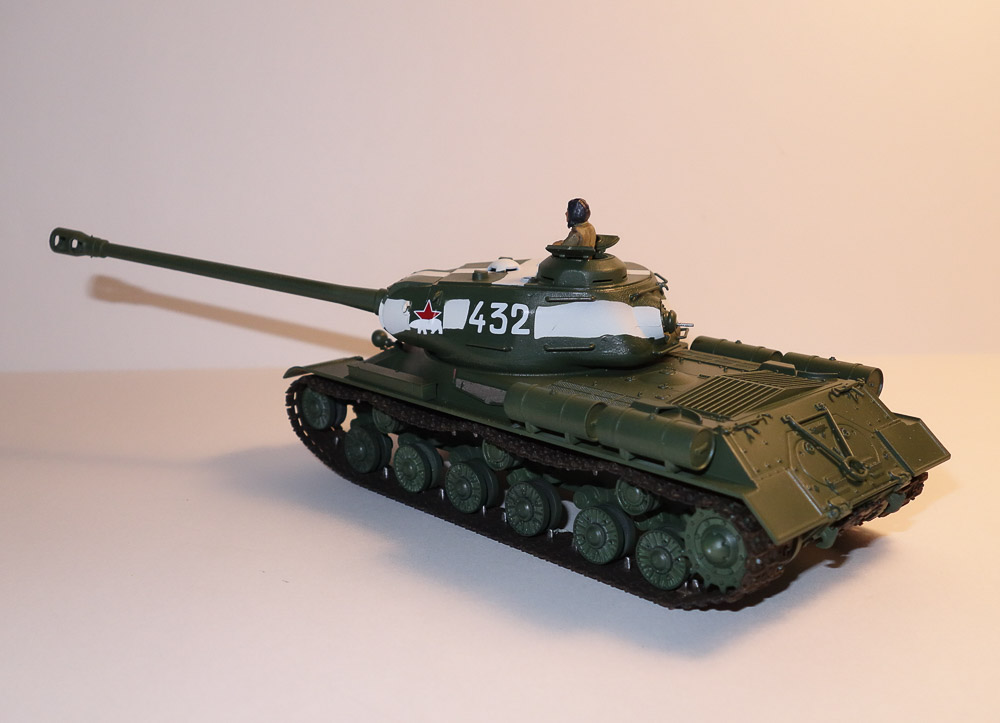
Tamiya JS-2 Russian Heavy Tank, Model 1944 ChKZ, 1/48 scale, Kit No. 32571


This kit was released in 2012.  It comes with link and length tracks and a commander figure.  There are markings for four different tanks.  All in all, this is a very nice kit like all the others in the Tamiya 1/48 series.  This series of models lets the modeler build a nice Tamiya kit that does not take up much shelf space, can be finished in a short period of time, and can be obtained for less than $30. 

Markings are included for four tanks.  I picked a machine of the 7th Independent Guards Heavy Tank Brigade in Berlin, April 1945.  Aside from the machine gun near the main gun, there was another in the rear of the turret facing aft.  It is a very impressive machine.

There is a gap between the bottom of the hull and the side fenders, which is somewhat common in tank kits.  I was going to have the top hatch open with the commander figure installed, so from certain viewing angles, you could see through the gap.  To remedy this I cut a disk of thin plastic, painted it black, and cemented it to the bottom of the turret.

The link and length tracks are a challenge in that you have to pay very close attention to the assembly sequence and make sure the correct parts are being assembled in the correct order.  The finished result is worth it, particularly with this tank as there is quite a bit of sagging on the upper track run.  Those sags are very challenging to reproduce with “rubber band” vinyl tracks.  Dealing with the track assembly took about half the total assembly time of this model.


Ultimately, I liked the bright green color so much, I decided to forego any weathering.  It now looks like a display tank at Bovington.  I once read a comment by Steve  Zolaga, noted armor expert, that Russian armor green was very bright.  I think Testors has discontinued the Acryl line of paints, so my two bottles will come in handy.

I used these paints and finishing products:

Testors Acryl Russian Armor Green 4807
Testors Acryl Flat Black 4768
Vallejo Game Color Wash Flesh 73.204 (for the figure)
Vallejo Game Color Wash Umber 73.203 (for the figure)
Vallejo Model Color Khaki 70.988
Vallejo Model Color Medium Flesh Tone 70.860
Vallejo Model Color Black Grey 70.862
Tamiya Surface Primer - Grey
Model Master Enamel Steel 1780

Pros

Excellent subject.

Part fit is excellent.

Cons

Nothing worth mentioning.

I used a compass with two points to cut out a thin ABS sheet plastic disk.

The disk was painted black on the interior side.

The finished result.
After the grey primer, I painted white over the areas that would be masked.

Here are the main sub-assemblies.  The 4 silver objects are metal and add weight to the model.
I used Silly Putty to mask the white and to make it look painted on.  It was difficult to cut the strips and pick them up without them losing their shape.  After all, it is Silly Putty.  Next time, I will put the putty in the refrigerator after I cut it and before I try to pick it up.


Saturday, January 18, 2020

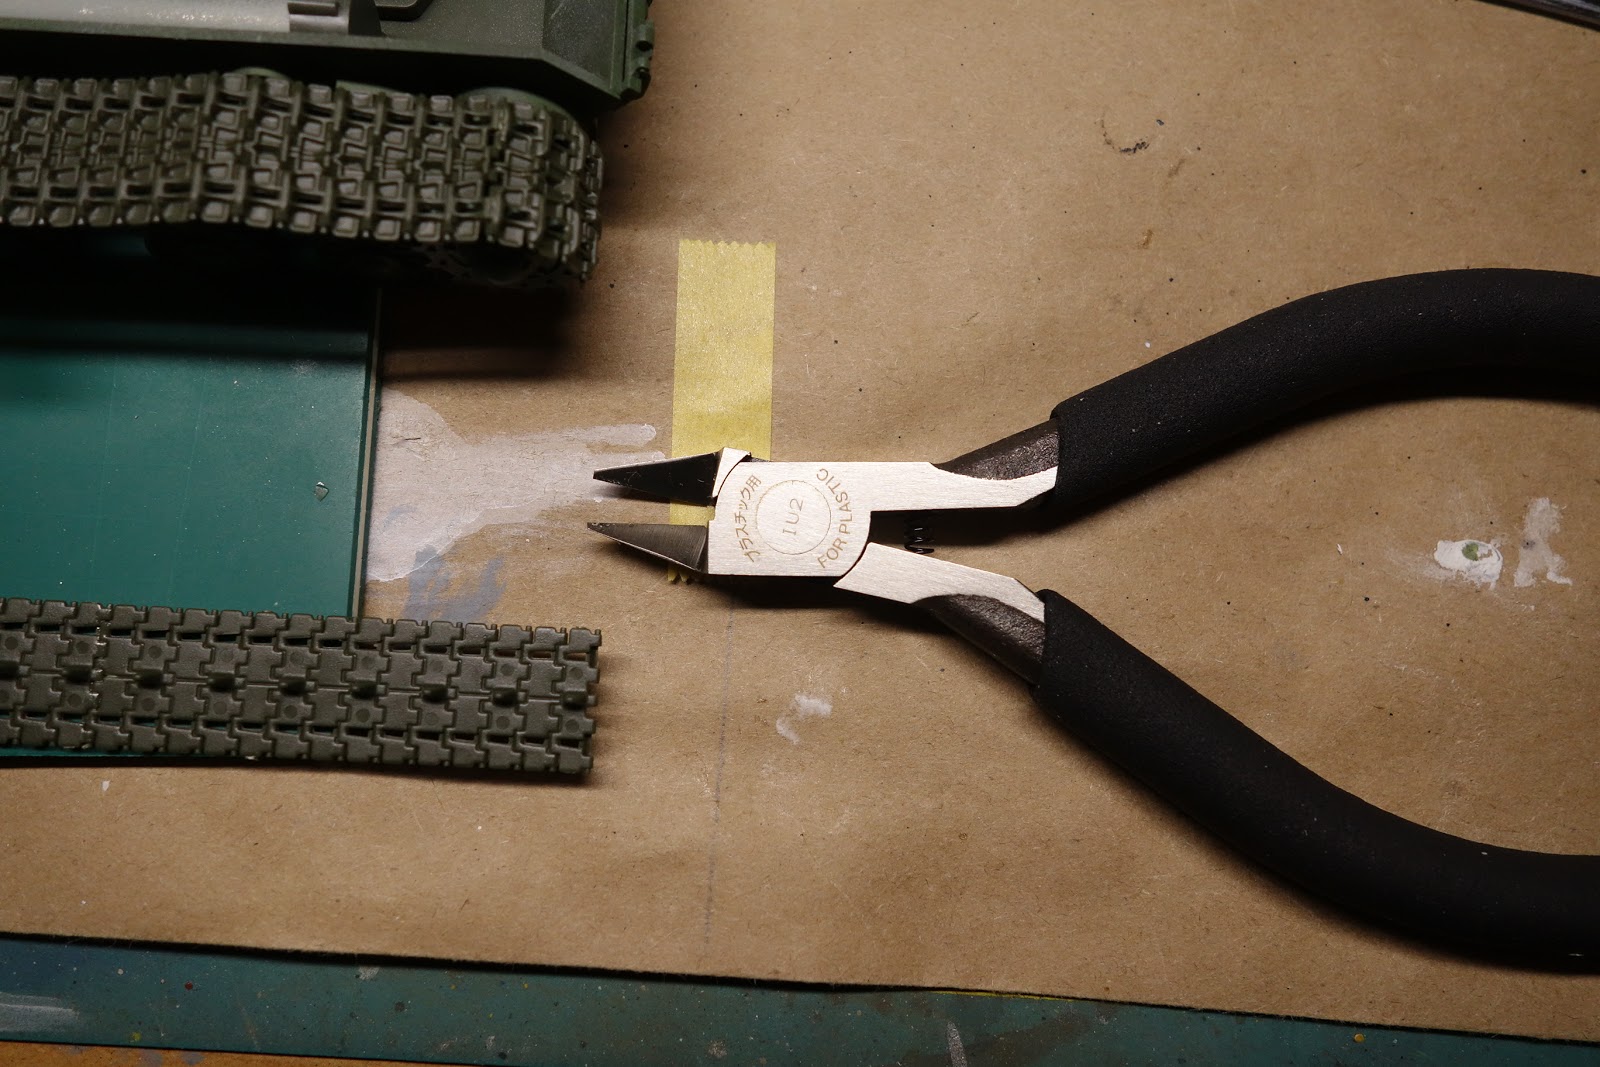
Tamiya Craft Tools 74123 Sharp Pointed Side Cutter For Plastic (Slim Jaw)

Occasionally I run into some new tool or other item that helps my model building, and I like to pass the information along.

This is such an item.

I found these on eBay for sale by a seller in Japan.  I ordered them for about $25 ppost paid.  They came in a nice little package in less than two weeks.

Right now, a Tamiya JS-2 Russian Heavy Tank in 1/48th scale is on the workbench.  There are a lot of small parts.  As you know, when cutting small parts off the sprues it is easy to deform, break or otherwise damage the part.  It is very easy to leave some of the plastic material behind when nipping the bridge between the part itself and the sprue.

I had none of those issues with this tool.   The cutting jaws are very small allowing you to get into small spaces.  And, the jaws are very, very sharp making for a clean cut with no excess left behind.

I can see these cutters are going to get a lot of use on my workbench.  They have my unqualified endorsement.

The cutters are little over 4" in length and the handles are covered with firm form padding.