Saturday, March 21, 2020

Tamiya, Ilyushin Shturmovik IL-2 Type 3, 1/72, Kit No. 60781

I was looking for a relatively simple project, and this kit 2013 release was in my stash.  Tamiya’s 1/72 scale aircraft are usually among the best in that scale one can buy.

The IL-2 was the Soviet AF’s famous “flying tank”.  This nickname was bestowed on it by the Germans who were amazed at the ability of the IL-2’s armor to shed small arms fire.

Stalin famously said this aircraft was as important to the military as bread and air for the soldiers.  In that same statement he expressed how upset he was at low IL-2 production.  Construction delays caused by constant improvements being added to the aircraft at the expense of production volume were the main cause.  Stalin sent a message that he wanted production increases pronto, and ended the note with “This is my final warning.”  With Stalin’s reputation for executing anyone who displeased him, this must have had a dramatic effect on the production volume as Wikipedia says that 36,183 were built between 1941 and 1945.

I decided to use the markings for an aircraft of the 16th VA which participated in the Battle for Berlin in April and May 1945 when the USSR smashed the living daylights out of what was left of the German army.

For the first time, I used Vallejo Matt Varnish 70.520 as a final coat, and I am very pleased.  I usually use Testor’s Dullcote, which works well.  But I had a bottle of the Vallejo and thought I would try it.   It dries fast and very flat.  And it sprays very easily with a little thinner added (Vallejo Airbrush Thinner 71.061 in this case).  The finish is smoother to the tough than Dullcote, and therefore I expect it will make listing easier.  I am very pleased with the product.

Multiple weapon loads are possible as bombs (2 sizes) and rockets are included.  However, the mounting tabs on the bombs and rockets are so badly designed that they might as well have not included them.

This is a nice kit, but the wing attachment and the weapons attachment points bring an excellent kit down to just an okay kit.  Too bad.  Unless you are an IL-2 fan, you might want to skip this one.  The engineering on this kit was a bit odd considering the high standards set by Tamiya.

Anyone who has followed my blog knows I am a fan of Tamiya kits.  My criticism of the IL-2 kit  has its reasons.  This is a kit released only seven years ago, not some re-pop of a kit from the 1970’s and therefore should be judged by much higher standards.

Pros

Main gear doors have good sized tabs to mount them to the airframe.  This is one of my common kit gripes, i.e., no provision to mount landing gear doors so they fall off with the slightest touch, like when you dust the model.

Interesting subject with markings for three aircraft.

Cons

Odd seam where the wing mounts to the fuselage making a clean fit somewhat tricky.  It is not clear why they engineered it this way.

There is no provision for an open front cockpit canopy, which makes it hard to see the details of the cockpit which are very nice even in this scale.

Also, see above.
The odd fuselage to wing joint can be seen here.


 As always, thank you for visiting my blog.  Comments are always welcome.

Sunday, February 2, 2020

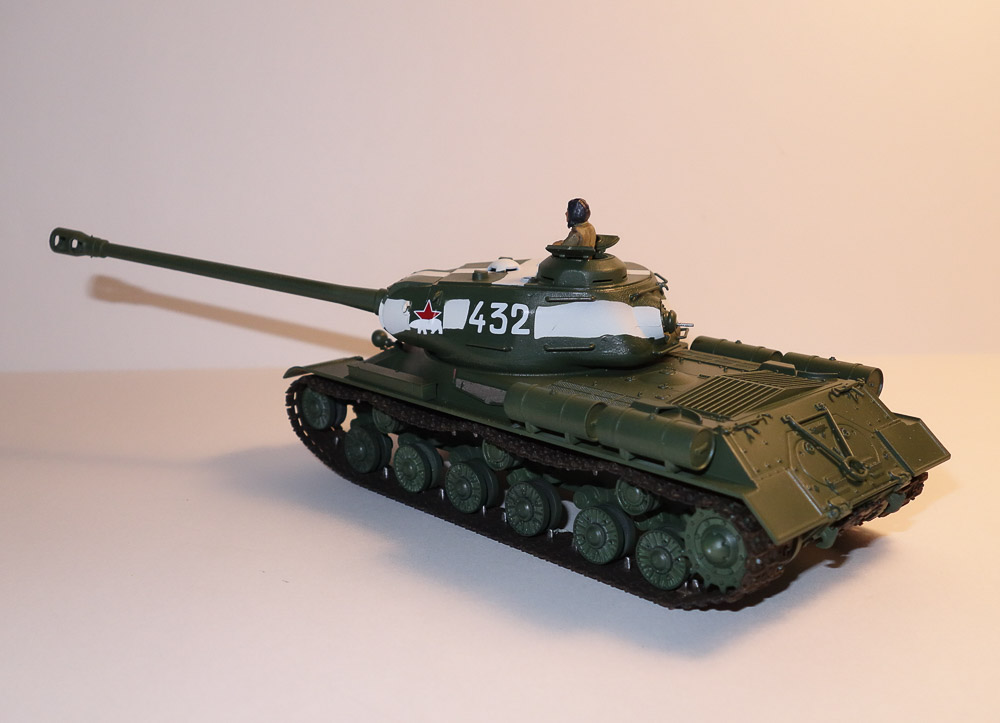
Tamiya JS-2 Russian Heavy Tank, Model 1944 ChKZ, 1/48 scale, Kit No. 32571


This kit was released in 2012.  It comes with link and length tracks and a commander figure.  There are markings for four different tanks.  All in all, this is a very nice kit like all the others in the Tamiya 1/48 series.  This series of models lets the modeler build a nice Tamiya kit that does not take up much shelf space, can be finished in a short period of time, and can be obtained for less than $30. 

Markings are included for four tanks.  I picked a machine of the 7th Independent Guards Heavy Tank Brigade in Berlin, April 1945.  Aside from the machine gun near the main gun, there was another in the rear of the turret facing aft.  It is a very impressive machine.

There is a gap between the bottom of the hull and the side fenders, which is somewhat common in tank kits.  I was going to have the top hatch open with the commander figure installed, so from certain viewing angles, you could see through the gap.  To remedy this I cut a disk of thin plastic, painted it black, and cemented it to the bottom of the turret.

The link and length tracks are a challenge in that you have to pay very close attention to the assembly sequence and make sure the correct parts are being assembled in the correct order.  The finished result is worth it, particularly with this tank as there is quite a bit of sagging on the upper track run.  Those sags are very challenging to reproduce with “rubber band” vinyl tracks.  Dealing with the track assembly took about half the total assembly time of this model.


Ultimately, I liked the bright green color so much, I decided to forego any weathering.  It now looks like a display tank at Bovington.  I once read a comment by Steve  Zolaga, noted armor expert, that Russian armor green was very bright.  I think Testors has discontinued the Acryl line of paints, so my two bottles will come in handy.

I used these paints and finishing products:

Testors Acryl Russian Armor Green 4807
Testors Acryl Flat Black 4768
Vallejo Game Color Wash Flesh 73.204 (for the figure)
Vallejo Game Color Wash Umber 73.203 (for the figure)
Vallejo Model Color Khaki 70.988
Vallejo Model Color Medium Flesh Tone 70.860
Vallejo Model Color Black Grey 70.862
Tamiya Surface Primer - Grey
Model Master Enamel Steel 1780

Pros

Excellent subject.

Part fit is excellent.

Cons

Nothing worth mentioning.

I used a compass with two points to cut out a thin ABS sheet plastic disk.

The disk was painted black on the interior side.

The finished result.
After the grey primer, I painted white over the areas that would be masked.

Here are the main sub-assemblies.  The 4 silver objects are metal and add weight to the model.
I used Silly Putty to mask the white and to make it look painted on.  It was difficult to cut the strips and pick them up without them losing their shape.  After all, it is Silly Putty.  Next time, I will put the putty in the refrigerator after I cut it and before I try to pick it up.


Saturday, January 18, 2020

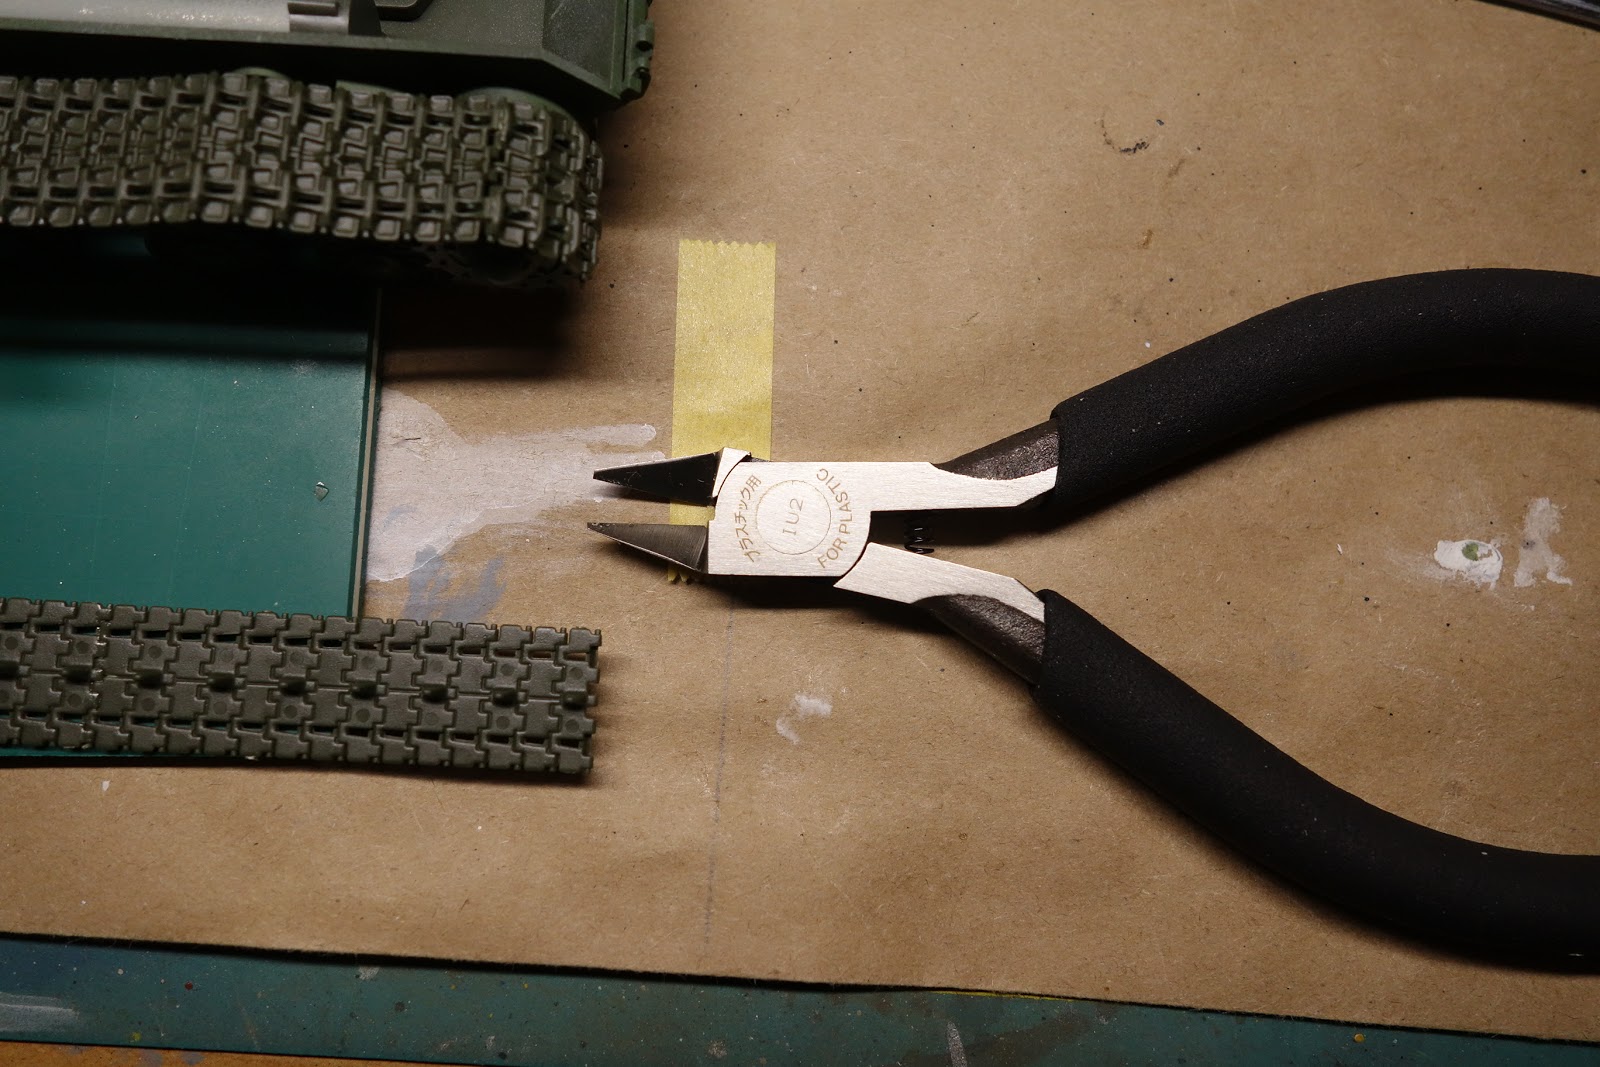
Tamiya Craft Tools 74123 Sharp Pointed Side Cutter For Plastic (Slim Jaw)

Occasionally I run into some new tool or other item that helps my model building, and I like to pass the information along.

This is such an item.

I found these on eBay for sale by a seller in Japan.  I ordered them for about $25 ppost paid.  They came in a nice little package in less than two weeks.

Right now, a Tamiya JS-2 Russian Heavy Tank in 1/48th scale is on the workbench.  There are a lot of small parts.  As you know, when cutting small parts off the sprues it is easy to deform, break or otherwise damage the part.  It is very easy to leave some of the plastic material behind when nipping the bridge between the part itself and the sprue.

I had none of those issues with this tool.   The cutting jaws are very small allowing you to get into small spaces.  And, the jaws are very, very sharp making for a clean cut with no excess left behind.

I can see these cutters are going to get a lot of use on my workbench.  They have my unqualified endorsement.

The cutters are little over 4" in length and the handles are covered with firm form padding.


Sunday, January 12, 2020

Monogram AT-6 Texan, 1/48 scale, Kit No. 5306


This is a real oldie having been in my stash for decades.  The decals in this kit were marked “3-80” indicating they were printed in March 1980, quite early in this kit’s commercial life.

With this kit, even when the molds were brand new, there were some flash and fit problems, but nothing that bad.  Ejection pin marks were few and mostly out of sight.

And, yes, all the surface detail is raised.  The only complaint I have about raised detail is that it is removed when filling seams and very hard to replace.

Somewhere along the way, I picked up AeroMaster Decals 48-387A “T-6 Texan Collection”.  Being a proud Arizonan, I picked the markings for a T-6 used for aerial gunnery training at Luke Field, now Luke Air Force Base just west of Phoenix and home of the F-35 Lightning II fleet.

Luke Field AT-6 cir. 1941.  Public Domain photo.

Public Domain photo.
 The wing walks are from an old Scale-Master Stripes sheet of decals.  Still good after all these years and as handy as ever.

It was fun to make a model from years gone by.  I enjoyed the project very much and will give the other few Monogram kits I have a second look.

I have a nice Monogram Promodeler A-26B Invader I got off Ebay a few years ago which looks nicely detailed.  (I know the ICM WWII version is due out soon and will probably be a more detailed kit, but the old Monogram models still looks pretty good when done.)

I also have in my stash the Monogram TBD-1 Devastator and some decals for Torpedo Squadron 8 at Midway that deserves to be built.

These old Monogram kits are frequently available at model shows at very low prices, so you might want to keep an eye out for one.

The surface has raised details, of course.  I do not mind the raised panel lines so much, but I hate all those rivets.  If I felt it necessary to completely sand and file the surface flat and re-scribe the details, I would look at a more modern kit and not go to all that trouble.  With a flat military paint scheme, they are much less intrusive, but as we all know metal finishes make everything stand out.

The 1979 Copyright date is clearly visible.  The instructions are not that bad.

The decals are pretty thick, as can be seen.  I only used the 2 prop blade labels.

The detail of these parts is not bad at all.  I skipped the figures.

Nice added sidewall detail can be seen as well as the absence of ejection pin marks.
Nice cockpit detail parts.

Instrument panel detail popped out with some careful painting.
I took this photo at Falcon Field, Mesa.  The .30 cal. wing gun with a short barrel can be seen as well as the cowl gun.  These were for aerial gunnery practice.  The kit's original wing gun was way too long and was cut down.


I painted the anti-glare panel after the silver was applied.  I have learned that you cannot mask enough.

Notice the copyright mark on the exterior of the lower right stabilizer.  I sanded that off.  Kits used to have such markings on the exterior.  I don't know why when the interior was also marked.

There are some fit issues, but there was noting that a little judicious sanding did not resolve.  This is one area where the raised detail is an issue.  With engraved detail, re-scribing is much easier than with raised detail where recreation of panel lines and such is a real challenge.

Colors used:

Vallejo Model Air 71.003 Red
Vallejo Model Air 71.010 Interior Green
Vallejo Model Air 71.043 Olive Drab
Vallejo Model Air 71.051 Barley Grey
Vallejo Model Air 71.057 Black
Vallejo Model Air 71.063 Silver
Vallejo Model Air 71.080 Rust
Vallejo Model Air 71.279 Insignia White
Vallejo Model Color 70.915 Deep Yellow
Vallejo Model Color 70.951 White
Vallejo Metal Color 77.701 Aluminum
Vallejo Surface Primer 73.660 Gloss Black
Tamiya X-7 Gloss Red
Tamiya X-18 Semigloss Black
Tamiya X-25 Clear Green
Tamiya X-26 Clear Orange
Tamiya X-27 Clear Red
Model Master Acryl #4749 Engine Gray

Pros

Very attractive subject.


Nicely detailed cockpit.

An effective simple tab system to allow dropped flaps to be displayed.  Cutting the tabs off allows the flaps to be displayed closed.  That is a feature I would welcome on modern kits.  The tabs make the joint strong enough to withstand moderate handling.  Today, all we ever seem to get is a butt joint with no strength aside from the glue we use.

Part fit was not bad.  A little sanding here and there was required, but nothing major.  The only putty was a small amount on the win g to fuselage joint,

Cons

The raised detail rivals the grip texture on a Gen 4 Glock pistol.  The panel lines would be tolerable alone, but the millions of rivets are too much.  If a flat, dark color scheme is selected by the modeler, these details would stand out less.  However, we all know one of the issues with metallic finishes is that even detail and flaw really stands out.

The pitot tube was molded as part of the upper wing panel.  It did not survive the build, although I was extra careful.  I should have cut it off before I started.  It was broken off and lost during the painting process.  I replaced it with an extra from my spares box.

The clear parts are somewhat thick and therefore there is some distortion.  The frames, however, are very nicely engraved making masking the canopy much easier, so this last observation is both a Pro and a Con.


Displayed on a 1/48 model shelf above a 1/72 model shelf.

As always, thank you for visiting.  Comments are welcome.