Friday, December 29, 2017

The Final Three Models for 2017

As the end of the year approaches, I thought I should post the final three models I made this year.  Altogether, I made ten (10) models in 2017, which might be something of a record for me.

Grumman F6F-3 Hellcat
Eduard ProfiPACK, 1/72 scale
VF-6, USS Intrepid
Lt. Alexander Vraciu
February 1944

This model was painted with Tamiya paints topped off with some coats of Micro Satin before and after decals were applied.  Some light weathering was used.  I am not a great fan of extensive weathering.  I know warbirds looked pretty grungy much of the the time (if they lasted long enough), but I simply prefer the “fresher” type finish.

I really like ProfiPACK kits, as they are so complete, give you a choice of many markings, and the decals are first-rate.  In today’s market with today’s prices, I think they represent a good value.


Chance Vought F4U-1 Corsair “Bird Cage”
Tamiya, 1/48/ scale
VMF-124
Guadalcanal, May 1943
Pilot:  Lt. Ken Walsh (first one day ace)

I always liked the look of the “Birdcage”.  This is a typical Tamiya kit - excellent fit and detailed parts.  One of my interests is the Battle of Guadalcanal.  The aircraft modeled here is a veteran of that campaign.  Ken Walsh went on too fight in Korea and Vietnam, and he retired a full colonel.

The decals came from an old Aeromaster sheet (I guess they are all "old" now).  I added some Eduard seat belts.  Aside from that, this one is straight from the box.  Paint is by Vallejo.


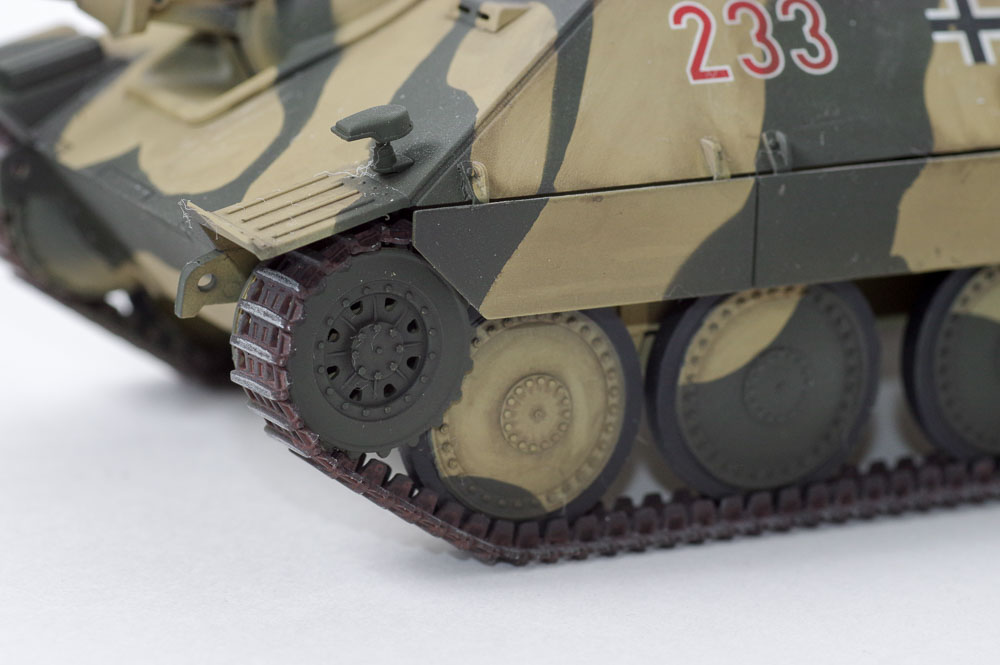
Jagdpanzer 38(t) Hetzer - Early Version
Academy 1/35 scale
1944-1945 - Unknown Wehrmacht Unit

The Hetzer (“hunter”) was a light anti-tank vehicle built on a Czechoslovakian chassis.  The same basic chassis was put to use as an anti-tank gun and artillery piece.  I believe it served on all fronts during the war and even served with the French Army after the war.

I wanted to build an Academy armor model, and I chose this one.  I was pleased with the fit and the apparent accuracy.  This was my first experience with link and length tracks, and I enjoyed it.  Patience is required as you must let the glue set and dry before you move on or the tracks keep falling apart.  I see that many new kits are including a jig that allows you to assemble you link and length tracks off the model.  That is a real convenience.  Hopefully we are at the end of vinyl track era.

Colors  by Vallejo.  Decals from a Tamiya kit.  I applied them to dress it up a bit.  The model was weathered with some Tamiya Panel Line Accent Colors (dark brown and black).

A Hetzer during the Warsaw Uprising
Compared to a King Tiger


Thank you for looking.  Best Wishes for a Happy New Year!

Thursday, November 16, 2017

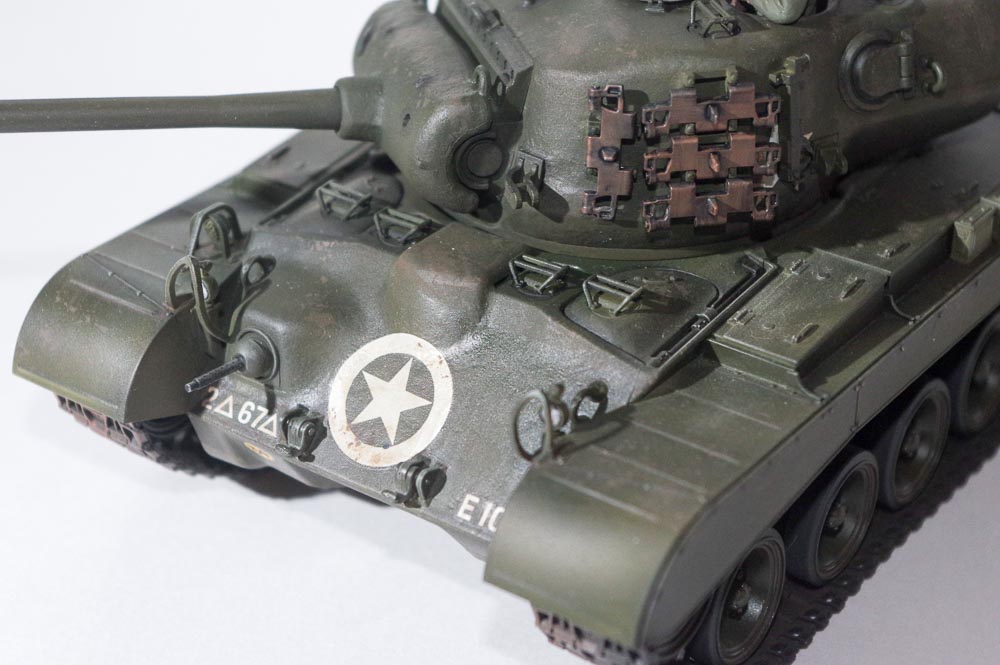
M26 Pershing - Tamiya 1/35 scale, kit no. 35254

This kit made its debut in 2002.  I would consider it among the “new” kits in the Tamiya line, as opposed to the kits from the 1970’s still in production.  By that I mean newer kits have some extra accessory parts, fewer molded-in details, and tracks that are glued with plastic cement.

Which is not to say I am knocking the older kits, many of which are available and still good kits, like the M16 Multi-gun Motor Carriage (if you can find it).

There are no nits to pick here.  The frank fact is Tamiya makes some the finest plastic models on the market today.  For whatever reason, this kit was not available from any US distributor, so I ordered it from Japan via eBay.

The M26 Pershing arrived in Europe in 1945 and was involved in some actions at the end of the war.  The most important of which was the taking of the Ludendorff Railroad Bridge over the Rhein River at Remagen, Germany.  They supplied fire support as the infantry expanded the pocket and held on until reinforcements arrived.  Their heaviest use in combat came in Korea where they served with the U. S. Army and the Marines.  Markings for both WWII and Korean War Pershings are included in the kit.

The tank has always interested me as I saw them in Korea in the mid-1960’s when I served there in the Army.  Some of the old tanks were dug in up near the DMZ.  Only their turrets were showing, and it was said they guns were bore sighted at particular points.  If the North Koreans came south, several rounds would be fired at this targets (mostly road junctions and choke points) and the abbreviated crew would hop in a jeep and head south.  Or at least that is what we were told about them. 


I finished this model with Tamiya olive drab over Tamiya “rattle can” surface primer.  The surface primer sprays beautifully, levels out, and guns a very resilient  base coat.  I will be using more in the future.


I highlighted the model using Tamiya panel line fluid in black and dark brown.  This is great stuff.  I applied it after the olive drab was covered with Microscale Satin Clear Finish, which comes up a nice semi-gloss.  It provides a barrier.  After the panel line fluid is applied, a brush slightly moistened with mineral spirits is used to blend it into the surface.  It looks great when done.  I applied some “chipping” with Vallejo dark brown and the a final coating with Vallejo Model Wash European Dust (applies with a flat brush in a very thin coat).  All of this effort really makes the details pop out.

Here are some photos.  Thank you for looking.  Any comments are welcome.


Wednesday, November 1, 2017

Grumman F8F Bearcat or Why I am Building a non-WWII Model - Part 3


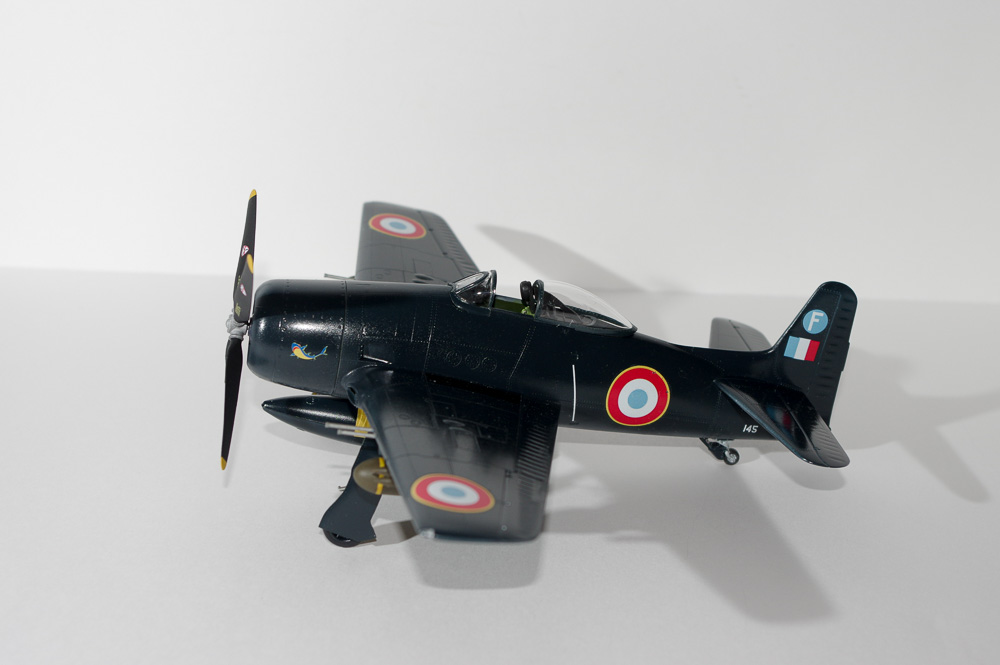
F8F-1B Bearcat, Hobby Boss, 1/48 scale, Kit no. 80357

Well, some time has passed  since my last entry here.  We have been traveling in the Republic of Ireland, Northern Ireland and Scotland.  And, the summer heat has broken here in Arizona and the beautiful autumn and winter weather has set in.  It tends t drive one outdoors away from the model building bench.

Once we returned, I got right down to completing this model.  When I have had a longish break in building a model, I sometimes lose all interest in it.  Not here.  I returned home looking forward to finishing the model.

The model was first painted with a base coat of Tamiya Grey Surface Primer.  It sprays well and provides a good surface for final coats.  It is expensive (about $10 per can) and a fair amount is used from the can on one model.  However, it is an excellent product.


Gloss coats are not my favorite;  I avoid them.  But I could not here.  I had some Model Master Acryl Sea Blue on hand and used that.  The wheels wells are Acryl Zinc Chromate Yellow.  Testors Glosscote was applied before and after the decals.

For decals, I used some from Berna Decals.Their sheet no. 48-14 offers a number of Bearcats in French Service in Indochina.  Not that the kit decals were bad.  I was just attracted to the markings provided by Berna, which I never used before, but will in the future if they have markings I want.

Here are some photos of the finished model.  I think that Hobby Boss did a very nice job on this kit, and I look forward to building another model or two from their offerings.


One can only wonder what kind of combat record the F8F Bearcat would have compiled had the Pacific war dragged on further.  The first U.S. Navy Bearcat unit was in the Pacific at the end of the war, but had only just arrived a short time before the war ended and never flew in combat.  Jets came on so fast after the war (no pun intended) that the Bearcats quickly found themselves in reserve units.

As always, thank you for visiting my blog.  I have several more kits I finished this year and will be posting them before long.

Saturday, August 19, 2017

Grumman F8F Bearcat or Why I am Building a non-WWII Model - Part 2

F8F-1B Bearcat, Hobby Boss, 1/48 scale, Kit no. 80357

Now that I have de-bagged the parts and washed them (in Dawn and warm water), following the instructions, I am working on the cockpit.

It is nicely detailed.   The seat is very accurate according to photos I have seen.  The ejection pin marks are in places where they do not matter - a nice touch.


These “STEEL” seat belts by Eduard are really nice.  I have used them on other models.  They are beautifully colored and fairly easy to work with.  Since they are pre-painted, I cannot anneal them to make them more flexible for a more realistic draping over the seat.

The instructions are a bit vague on colors, but you can see a virtual reality “tour” of an actual F8F cockpit (and several dozen other naval aircraft) at the Naval Aviation Museum (http://www.navalaviationmuseum.org/nnam/virtualtour/). 

I started of with Testors Acryl Interior Green (4736) for most of the interior and Yellow Zinc Chromate (4851) for the tailwheel well.


Here is a closeup of the instrument panel.  This is constructed by carefully painting the clear panel piece around the dials and then putting the supplied decal behind it.  The result is very nice and appears quite realistic.


This shows the interior pretty much completed.  The area in front of the cockpit has some braces, part of the exhaust system and two tanks (lubricating oil and/or compressed air?).  This area will be partially visible once the wing is mounted, so I applaud Hobby Boss for supplying these details which could have been overlooked.

My last several models have been built with Tamiya Extra Thin Cement in the 40 ml bottle with the green cap.  I have found this glue to be the best I have used.  The built-in applicator allows precise dispensing.  When it fully sets, it stays set.  I am also using Tamiya Cement in the 20 ml bottle with the orange cap.  The latter is now my substitute for thick CA, as it penetrates through paint and sets up rock solid.

In this last photo, I have cemented the fuselage halves using Tamiya tape and two clothes pins to hold everything together while the Tamiya cement sets.
I am really enjoying this kit.  (All is forgiven for the Hobby Boss Hellcat shaped like a potato.)

As always, thank you for looking.  I welcome any comments.   More on the Bearcat soon.


Sunday, July 30, 2017

Grumman F8F Bearcat or Why I am Building a non-WWII Model?

F8F-1B Bearcat, Hobby Boss, 1/48 scale, Kit no. 80357

For quite a long time, I have only been modeling World War II aircraft and armor.  Making a model of the Bearcat will be a departure.

A few years ago, I read Hell in a Very Small Place: The Siege of Dien Bien Phu by Bernard Fall (Lippincott 1966).  I had no idea what the French soldiers and nurses suffered there and the fight they put up against increasingly hopeless odds.  Young French nurses and paratroopers were jumping into the caldron right up until the surrender.  (A few Americans died flying some of the C-47s carrying them.)

To say that their courage and fighting ability were breathtaking is an understatement.  And flying mission after mission at the very edge of their range were the pilots of the Grumman Bearcats delivering rockets and bombs to the North Vietnamese Army that was growing in strength and numbers by the day.  The French high command wanted to draw the NVAs into a set piece battle and a base in the valley at Dien Bien Phu was to draw them in.  That part of the plan worked very well.

The Bearcat went into squadron service in May 1945, but final preparations and training for combat were still underway when Japan surrendered in August.  The Bearcat remained in production until 1949 and equipped a number of squadrons.  The basic design requirements were for an aircraft with the biggest possible engine in the smallest possible airframe.  It was a pure interceptor/fighter.  Which is why when the Korean Conflict came along, the U. S. Navy looked at the Bearcat’s ordnance carrying ability and decided to take the F4U Corsair to Korea in the ground attack role as the Corsair could lift a lot more weight.  Therefore, the Bearcat flew not a single combat mission in U. S. service.

The French had received a huge number of American aircraft during and after WWII.  Among them were a number of Bearcats which the French used in a ground attack role during their war in Vietnam.
As to the kit, Hobby Boss has not been my favorite maker.  I bought one of the their Hellcats (with the FAA markings).  The shape on that model was as far off as anything I have ever seen.  The fuselage was more like a barrel.  It is still in the stash, but its use will come when I need another paint dummy (a position currently being filled with an ancient Monogram Fw190).

As to their Bearcat kit, it has been the recipient of many very complimentary reviews.  I have examined it, and cannot see any faults at all.  Hobby Boss is reprieved for now.

There will only be three dominant colors.  The aircraft is overall dark sea blue, and Testors Acryl #4686 is perfect.  It produces a semi-gloss finish ready for decals.  The wheel wells are yellow zinc chromate (Acryl #4851) and the interior is interior green (Acryl #4736).  The rest will be some hand-brushed details.

We will see if I stay with the kit decals.  I was ordering a few items from Hannant’s in the UK, and I added some decals that looked good.  Hopefully they will be.

Aside from that, the only after market item will be some Eduard seat belts.  (I cannot seem to build a model without something from Eduard finding its way in.)

And, now I will post this and get to work on my tribute to the brave airman and soldiers of France who fought their hopeless battle so long ago and far away.  As a veteran of our war in Vietnam (U. S. Army Intelligence Service,  MACV, J-2, 1965-1966), I am in awe of what they did.