I can’t believe my last post was in February. Well, time flies when you are having fun. One of my other interests is Cowboy Action Shooting, and I have started competing again. And it takes time what with reloading ammunition, taking care of a number of firearms, practicing and competing.
And, I put the B-25 aside and did build that tank. Actually, this is the ICM kit boxed by Revell. Since I got back into the hobby, I have discovered that there are fewer new kits coming out and that many of the “new” kits are re-boxed older kits. I understand that ICM Holding is a Ukrainian company, and from what I saw in this kit, they produce a very nice model kit.
I was impressed with the surface detail of the model, particularly the weld marks and the surface texture showing the casting. The parts fit was excellent, and the instructions were reasonably clear. I used some dry transfer markings. I am not sure what they say. Probably Stalin is a Great Guy! or I Love the Party!
I made an attempt to do some weathering. Tamiya makes a powdery product that you brush on, and I tried some. It left a nice dusty looking finish. It is called Tamiya Weathering Master, and it comes in all sorts of colors.
Preparing to do this kit, I read a number of articles about weathering. And, I looked at hundreds of photos of finished models. Now, there is no question that some armored equipment looked pretty beat up and covered with dirt and mud. However, if one looks at photos of real armor in operation during the Second World War, many of the vehicles are not all that weathered, and that is because they have not been in service that long. The armies in the East consumed armor at a ferocious rate. Some of the tanks simply did not last long enough to get very weathered. I know the U. S. Army during the war retrieved damaged armor form the battlefields and put it back in fighting condition. How much of this the Russians got to do and what their practices were, I am not sure. The conditions they fought under had to be seen to be believed. For instance, tanks produced in Leningrad rolled right from the factory into the front lines unpainted. They did not have the paint, and they did not last that long anyway.
The markings for this model tank are from a T-34 that fought in the Battle of Kursk, the largest armor battle in all history. I prefer to think it is depicted on it way to Kursk and therefore just covered with road dust.
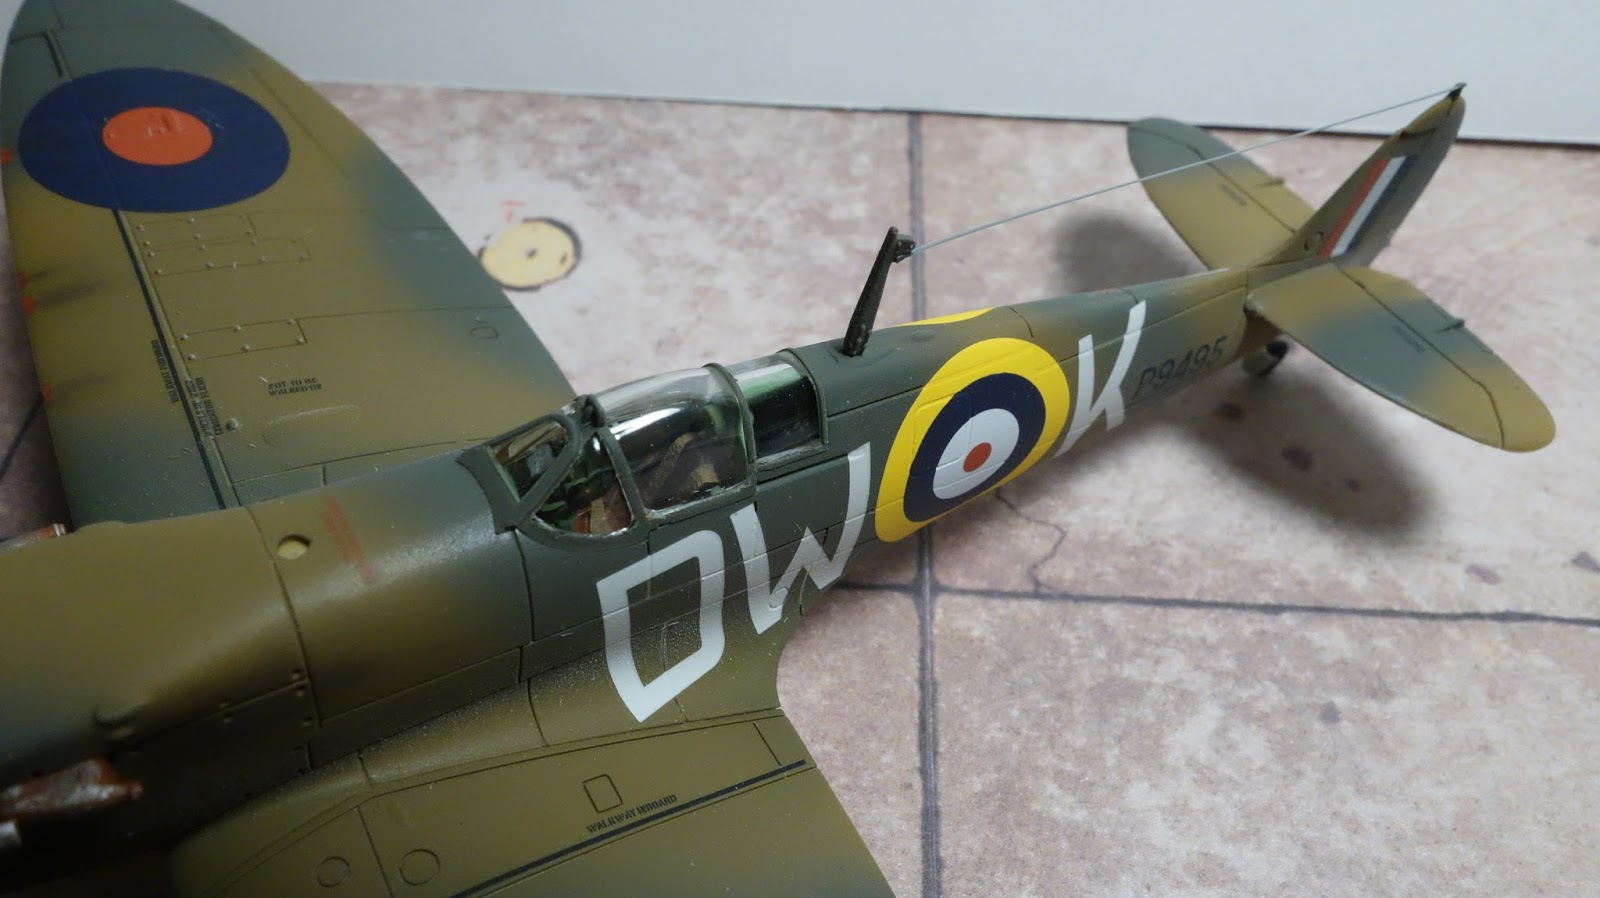
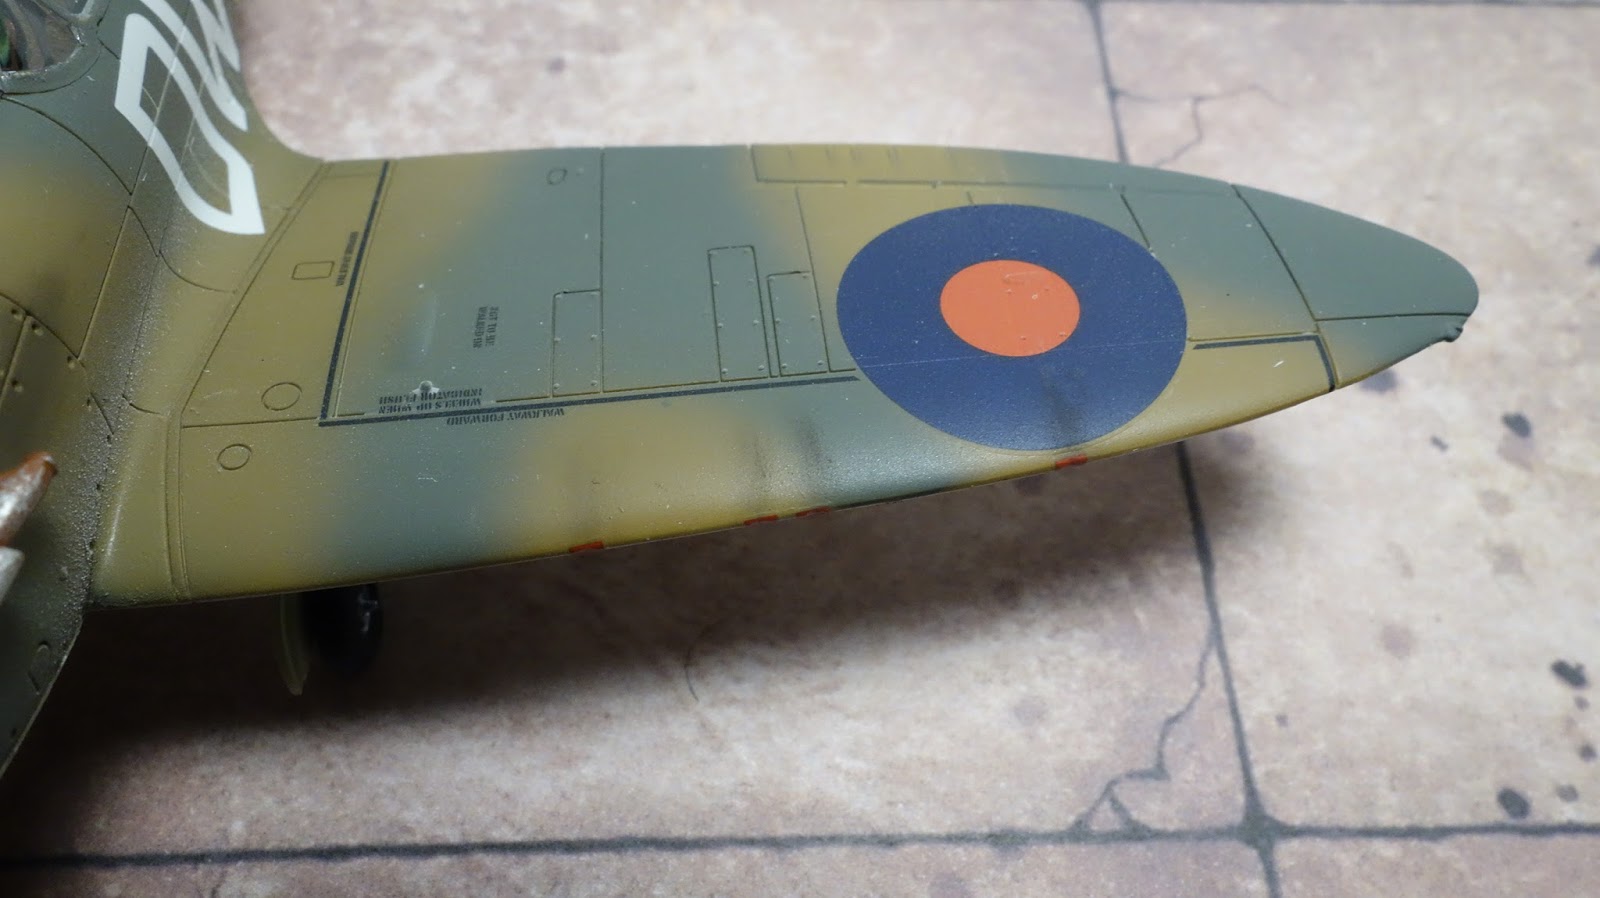
I also built another Spitfire kit from the stash, a Tamiya 1/48th scale Spitfire Vb. I will post some photos of that soon. I got into that one as I could not believe that Silly Putty made good masking medium for hard lines, but is sure does! I will never try another method.
The temps are soaring here in The Valley of the Sun, so our “building season” is commencing. The B-25 is back on the workbench, and I am getting to the final details I need to do before painting commences. More on that very soon.
Thanks for your interest.
Saturday, May 28, 2016
Monday, February 15, 2016
Revell-Monogram B-25J Mitchell – WIP Part 4
Before I wax eloquent ever again about the pleasures of building one of these old kits, I shall remember how much sanding, filing and filling is necessary to complete them. I am now wondering about that Monogram B-24D in my stash. To be frank, the problem for me is that the time I might have spent on more detailing, weathering, etc. is being used up just making it all fit together. Maybe I am a modeler in too much of a rush. That may be the case.
All that being said, I am grateful this kit is still available. There is nothing like it in 1/48th scale if you want a J model. I would love to tackle the HK Models B-25J, except, I would need to buy a bigger house. There are limits.
I find that if I stop a project by removing it from the bench so I can build something else, the chances it will ever return to the bench to be finished are slim to none. The bench may sit there with the model on it while “life” takes me elsewhere for other things. That is fine. As MacArthur said, “I shall return.”
Also, I find that if I do something everyday, no matter how small a thing that is, the project will keep going. Although I am longingly looking at a Revell 1/35th scale T-34/76 (Model 1943) that I picked up on a whim and am aching to start on, the B-25 must “take off” first. (I did some armor models twenty years ago, but sold all in my armor stash when I moved to the Southwest. I have always had an interest in armor. When I was in the Army, I was stationed for a time with the 1st Armored Division “Old Ironsides” at Ft. Hood, and I was always fascinated watching the armored vehicles.)
Here are some update photos:

I am cleaning up small parts and priming them now. I use Vallejo Acrylic-Polyurethane Surface Primer on almost everything. It provides an even base coat, and if I use masking tape on it, it never lifts. I have done maybe ten models with it that were masked with Tamiya and regular masking tape, and not one smidgen of paint has lifted. This primer really sticks to plastic, and any paint you cover it with (acrylic or enamel) sticks to it. So, it is happy masking.
The fuselage seam has been filled and sanded, and I sprayed surface primer lightly on the seam to see if there are some spots requiring more attention. I use Squadron White and Green Putties.
The fit of the nacelles to the wings was approximate. Quite a bit of work was needed there. However, since failing to do that would have left some prominent seams, the work was called for and I think will be rewarded in the finished product.
The fit of the fuselage halves just behind the cockpit was not the best, but some putty has taken care of that. I think the canopy will allow the interior of the cockpit to be seen clearly. And with the forward bottom hatch open, there may even be some light coming up from below. With all of the windows and hatches in this model, more of the interior will be viewable than I originally thought.
*****
In the next installment, I think the flying surfaces will be in place, and we will be thinking about the paint shop for this one.
Sunday, January 24, 2016
Revell-Monogram B-25J Mitchell – WIP Part 3
Here we are in January. After a Holiday Break with a trip across the country, spending some serious time trying to learn how to use an iMac after my Dell laptop crashed (I have been waiting for a chance to get out of PC World), and a few professional obligations, I am back at the bench.
Over the years, I have found that leaving a project sitting for a month is an invitation for it to be abandoned. Since I have recently had a re-awakened interest in armor kits, this one was in danger of being pushed aside in favor of a T-34/76 (Model 1943). But I will hang onto the tank, and forge ahead here.
I could have skipped doing much of the detail, as it will be hard to see. Since I am planning on leaving two hatches on the bottom of the fuselage (not to mention the open bomb bay, I thought I would go ahead with the details as they may be seen.
This area will be seen through the canopy. There is nothing extra in the detail department here. I merely painted the parts. No weathering either, and I wanted the colors to stand out through the canopy so the details would be seen. You can see the Terry Dean weight filling the wheel well. It fits perfectly, and I am hoping it will be heavy enough. I think it will be. You can also see the SAC white metal landing gear. The landing gear is somewhat flexible, and I think the will mean that a slight bump or other mishap will not result in it breaking in two. The detail is really excellent, and the metal landing gear will be more durable than the plastic, particularly the nose gear.. You can also see one of the many, many ejection pin markings present on these molds. In this case on the forward bulkhead behind the instrument panel. I left all of them alone that were not completely exposed. (One really appreciates modern molding techniques that have largely obviated exposed ejection pin spots all over the parts.)
This is the left side near the tail. This may be some kind of heater? I am not sure. Since it might be partially visible, I finished it. There are ammunition boxes all over to use in the defensive guns.
The bomb bay detail will be visible, so I finished the bombs, which were quite nicely molded.
I do not like to have fragile parts like the tail guns sticking out as I finish the model, waiting to be broken off. However, there was no way to install these parts in the last step. So, I will just have to be careful.
The next step will be to assemble the fuselage. I will paint and assemble the top turret, but it will be added toward the end. Also, there is a fair amount of detail painting on the nose section which house a number of guns. All in all, I am still enjoying working on this kit. It is amazing how well the molds and the kit design itself has stood up for 39 years!
Saturday, December 12, 2015
Revell-Monogram B-25J Mitchell – WIP Part 2
I have collected a few aftermarket items to enhance this project. With all the glass, I had to have some Eduard die-cut masks (EX119). These masks are so useful and time saving. Because of the size of the model, I have opted for a metal landing gear set from Scale Aircraft Conversions (48055), which I thought was a prudent investment. And, in my decal collection, I have some really nice markings from AeroMaster (I really miss these folks). My set is Mitchell Collection, Part 2, 48-134. Not that the kit decals do not look pretty good and much better than the decals Monogram used to include in kits. To keep the model from tail-sitting, I obtained a nose weight from Terry Dean. If this weight proves to be insufficient, I will add lead shot in front of the engines. I don’t think that will be needed, however.
This is a 1977 kit. I
forgot how many mold release pin marks appear on these older kits. There are many bumps and indentations to deal
with. The unfinished wheel well photo
shows two rather large ones, and the photo of the inside of the left fuselage
shows two on the right front.
My option has been to leave any alone that are not right on
the surface where they can be seen. By
the late 1990’s, it appears manufacturers learned how to not create so many of
these annoying marks, and it is rare to see them in a prominent position on a
modern kit.
The interior parts have been painted green zinc chromate
primer and olive drab. I am using Model Master Acryl for this part of the project. I prefer Vallejo Model Air paints, but there is not reason to let the existing stock of MM paints go to waste. Much of the
detail would not be seen once the fuselage is assembled. I have already dry-fit the fuselage together
and determined which areas will not be seen.
They will not be detailed.
When I have some more done, I will post again. Meanwhile, I still need to post something on the Eduard Yak-3 I finished in October.
Saturday, November 21, 2015
Revell-Monogram B-25J Mitchell – WIP Part 1
The B-25 Mitchell has always been about my favorite WWII
aircraft ever since I read the Landmark edition of Thirty Seconds Over Tokyo by Ted Lawson way back when I was in
maybe 5th grade. I have made
several models of B-25’s, but none are still with me. I always wanted to make the Monogram B-25J in
1/48th scale, so I have decided to get going on the one I have in my
stash.
How long this project will take, I do not know. It is now just a week before Thanksgiving, so
with the Holidays and year-end matters to attend to, this may take some
time. Which is a good thing, since I do not
have a shelf wide enough right now to display the finished model. Something will be arranged by the time it is completed.
The first step is to clean off my workbench, and then open
the box, take the sprues out, and wash them off to assure that mold release
agents are cleaned off. At the same
time, I have examined the sprues to make sure all parts are present and
properly molded. Have you ever gotten
part way through a model only to discover that part of the tail empennage or
something else was only partially molded?
That is a bummer.
I have also gotten together the material about the B-25 I
have in my personal library. That Camouflage and Markings is sure an
oldie. I have quite a collection of
similar books I acquired over the years.
This is sad, in a way.
Made in China? I bet it used to
say Morton Grove, Illinois, which was the home of Monogram Models the original
maker of this kit. Alas, Monogram was
bought out by Revell, their main rival.
And then the combined companies were purchased by someone else, and now
are owned by Hobbico. Raised panel lines
abound, but so what? They are not that
prominent on the finished model.
The preceding three photos show the very nice detail
Monogram achieved in 1977. The instrument
panel has excellent raised detail in the dials, the control columns and center
console are well-detailed, as are the ammo boxes. Too bad some of this nice detail will not be
seen once the fuselage is assembled.
One thing I do when starting a kit is to make a copy of the color
list on the instruction sheet, and then I tape it up over the workbench. It helps save time constantly turning back in
the instructions to find out what color is being suggested.
Next, I will be painting the interior spaces zinc chromate
green and starting to paint and mount the interior detail pieces.
Sunday, November 15, 2015
Airfix Messerschmitt Bf 109E-7/Trop 1/72nd Scale, Kit #A02062
This is my third new
Airfix 1/72nd scale kit this year.
They are such a far cry from the mid-20th century vintage
kits many of us grew up on. They fit
together fairly well, and the quality of the parts is definitely up-to-date.
I was attracted to the desert camouflage scheme on the box
art. I found a photo of the original
aircraft which I have included here. I
am sure it was originally a black & white photo that has been
colorized. This “Emil” is marked as it
appeared in the Western Desert in April 1941.
My only gripe about this kit is that Airfix refuses to
include swastikas, which were clearly a part of the historical markings of this
and other WWII Luftwaffe aircraft. (Without ranting anew here, I refer readers to
my July 10, 2015 post entitled The
Swastika & WWII German Aircraft Kits.)
Luckily, I obtained two swastikas from a friend who had some
in his spares box, so I was not forced to purchase aftermarket markings which
might have cost more than the kit itself to obtain a complete set of markings. (They came from an Fw190 kit, and are a
little large for this model, but no matter.
Better than none.)
By the way, the decals Airfix did supply went on flawlessly
with Microsol and Microset. They are
very well printed.
The panel line engraving on this model is much more delicate
than the engraving on the two previous kits I built, to wit: the Spitfire Mk.I and the Tomahawk. The molding on this kit was a definite – and
welcome - improvement. I hope the fine engraving
on this kit is indicative of what we will see on future releases.
The clear parts are okay, but thicker than you will find on
most modern Asian kits. One reason I
chose to leave the canopy closed is that if left open, the thickness of the
canopy moldings really shows and look out of scale.
The kit was painted with Vallejo colors over a coat of grey
Vallejo Surface Primer. I use Vallejo
Surface Primer on all models. It lets me
paint with acrylic paints and use masking tape (mostly Tamiya tape) and never
have an issue with the color paints lifting when the tape is removed. Vallejo Surface Primer applies easily via
airbrush with just a little distilled water as a thinner to help the paint
flow.
The finished model looks like a Bf 109. The proportions just seem correct. Airfix is getting that right. It looks good, and therefore it is good (to
paraphrase Duke Ellington).
I realize my paint finish does not do justice to the original, but I did as well as I can with the airbrush. If I had it to do over, I think I might just brush paint the green spots. I still like it.
Due to incomplete
markings, I would give this kit a grade of A-.
It would have been an A+. But be
warned. If you purchase an Airfix WWII
Luftwaffe model, be prepared to deal with the incomplete markings Airfix offers.
Saturday, September 12, 2015
Airfix Supermarine Spitfire MkIa, 1/72nd scale, Kit # A01071A
Some of us older modelers have fond memories of the Airfix
kits of the 1960’s. They were of a
uniform scale (1/72nd – sometimes referred to as “The One True Scale”),
they had much more detail than the contemporary plastic kit offerings, and the
range included many aircraft we all wanted to model, i.e., WWII fighters and
bombers. Today, the old Airfix kits are
invidiously compared to modern kits, but back in that day, they were superb. And, the single engine models were 50 cents,
well within our reach as kids.
This Spitfire is one of the newly designed kits in the Airfix
range. It comes with markings for one
Battle of Britain machine. You get two gray-blue
colored plastic sprues, and one clear sprue.
There is a decal sheet with full stencils and a complete instruction
sheet. The back of the box has a nicely
detailed color four view of the machine.
Here are my thoughts on this kit:
The Good
·
One of the all-time favorite subjects – the
Supermarine Spitfire in a Battle of Britain version.
·
Excellent instructions and color guide.
·
Fairly well detailed cockpit for this scale.
·
Realistically flattened tires.
·
Generally good fit of the parts with a minimum
of putty and sanding (some of which may have been caused by my own clumsiness).
·
Not over-engineered, meaning you do not need an
electron microscope to see the parts you are working with.
·
The decals are very well printed and appear to
be the right colors. Extensive stencils
are included. They apply well with
Microscale solutions.
·
Rational pricing, even if you pay list.
The Bad
·
The sprue gates are somewhat thick. This means that it is hard to cut the parts
off the sprues, since the plastic is at the same time soft and slightly
brittle. Parts must be very carefully
cut from the sprues to avoid unwanted gouges and indentations.
·
The surface detail while not having been made by
“The Mad Trencher” of Matchbox fame, the panel lines and surface details may
have been done by his cousin. The panel
lines on Asian kits are much more subtle.
These lines are not terribly prominent with flat, camouflage
finishes. I have not built a new Airfix
kit in a natural metal finish where such details would be far more noticeable.
·
The canopy is fairly thick, but is therefore not
as extremely delicate as some kits in this scale and easier to work with. It just is not as petite as it could be. It is one piece.
·
Only markings for one machine are supplied, the
610 Squadron at Biggin Hill in July 1940 – the height of the Battle of
Britain. One more choice might have been
nice. The red patches over the gun ports
are too small and hard to apply over the wing leading edge. They are square and should have been
rectangular. Painting them on would be
better, or some solid color decal cut up.
If I were to give this kit a grade, it would still be a
solid A. It was just plain fun to
build. The “bad” things I point out
apply to the other new Airfix kit I built (see post below on Curtiss Hawk), and
appear to obtain to several other new Airfix kits in my stash. They do not at all outweigh the good
qualities of this kit. I fully intend to
keep buying and building these kits.
Subscribe to:
Posts (Atom)