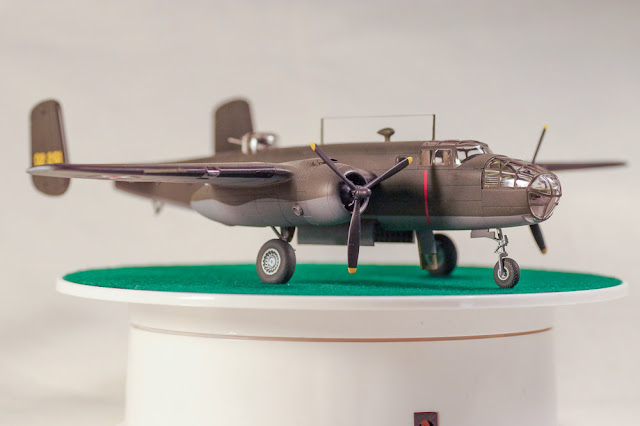

When I was about 10, I read Ted Lawson’s Thirty Seconds Over Tokyo, and ever since then the B-25 Mitchell has been just about my favorite WWII aircraft, so I was very pleased to see that Airfix had selected the B-25B to bring out in a modern kit. There was a derelict B-25 at the Teterboro Airport in New Jersey not far from my father’s company, and I really got a kick out of crawling through it on several occasions.
Airfix has produced some very desirable models in modern kit form that are truly wanted by the modeling community. Airfix’s research tends to be accurate, and they select interesting markings, sometimes a bit unexpected. And, the cost of the kits is more than reasonable. I have built several and has described same here on this blog.
However, the kits are often bedeviled by poor parts fit, exaggerated surface detail (e.g. overly deep panel lines), and parts that are not nearly as petit and detailed as they could be in some instances.
So, one might ask why am I building them? For a number of reasons - good ones. They are often the only game in town, and once you work your way through, you are left with a nice replica. There is surprisingly good detail here and there.
Eduard makes a mask for the Airfix B-25C/D kit (CX507), which differs from the B-25B in a few respects. Ninety percent of the masks are on the sheet, but you will have to cut out ten percent on your own, which was much better than all of them. Hannant’s says hey will be carrying Eduard CX579 which is designed specifically for the B-25B, but that is a future release and was not available when I wanted a mask set.
The clear parts are very nicely done and the canopy frames are raised enough to make cutting any masks much easier. They really make the model. I wish all the canopies I work on were that well designed.
Nose weight - I lost track of how much birdshot is in this model. Luckily I have quite a bit around, and I thought that once I packed the front of the nacelles and forward fuselage, all would be well (see photos below). The model is really heavy now. Once I had the landing gear and wheels mounted, it barely lets the nose wheel touch down correctly. If you touch the tail, it falls back on it. At least the nose wheel strut (which is somewhat delicate) has minimal weight on it as the model is just balancing slightly nose heavy.
Of course, Airfix gives you no idea of how much weight to use or where to put it. I have often seen models where the builder used a clear plastic strut on the fuselage just under the trailing edge of the wing where it will be less noticed. All in all, I think if I do a tricycle landing gear model again, that is the route I will go. The rear boarding hatch and ladder might be long enough to serve as such a strut, but Airfix does not say in the instructions, and since I already had it weighted, I did not check.
The instructions are vey clear and call out places where you need to make a choice depending on the color scheme you are using. And, there are excellent, large four views that show all decal placements including a large chart of common stencil placement.
Bottom line: While this kit is a challenge here and there to assemble, I am glad that Airfix brought it to market, and the finished product is looks good.
Pros
Very important subject selection.
The bomb bay is nicely detailed with three 500 lb. bombs and an incendiary bomb (an early cluster bomb). All aircraft carried this bomb load on the raid
Bomb bay and landing gear doors are designed to attach very sturdily. No worries they will falloff at the slightest touch.
The clear canopies have nicely raised frames that make masking easy, and the finished product is very clear making the cockpit and nose position very visible. (Spend some time making the interior look nice, because you will see it when you are done, unlike so many 1/72nd scale models.)
Cons
Some bad major parts fit, particularly engine nacelle wing attachment joints.
Propeller shaft very much too large for propeller hub holes necessitating drilling out the props or shaving down the shaft.
Only one Doolittle Raider marking included. A few more, particularly the famous “Ruptured Duck” flown by Lt. Ted Lawson, would have been nice. (I splurged and got that marking from DK Decals’ (dkdecals.cz) “B-25B Doollittle Raiders” set of 8 of the aircraft.) The kit decals I used went on well with Tamiya Mark Fit.
 |
Doolittle's plane taking off. (Pubic domain photo)
|
 |
Another B-25 taking off. (Pubic domain photo)
|
 |
The "Ruptured Duck" during preparation phase. (Public domain photo)
|
 |
Nicely detailed cockpit, which can be seen after assembly.
|
 |
The space available in front was filled with No. 7 shot sealed in place with Elmer's glue.
|
 |
A card plastic baffle allows the front of the nacelles to be filled with shot.
|
 |
It is not often I need to get these clamps out to keep parts in place while the glue dries.
|


No comments:
Post a Comment