 |
| Kit box top |
The Kit
Recently, I have become interested in 1/48 scale armor kits. They take up less shelf space (which I am running out of) and take less time to build. Tamiya makes nice kits no matter what the scale or subject, and these little armor kits are no exception.
This subject attracted me, so I bought it a couple of weeks ago on a visit to Andy’s Hobby HQ in Glendale, AZ. It is my first 1/48 scale armor build. (See the link to the right to access Andy’s excellent videos on YouTube if you have not seen them already.)
The Build
As expected. the kit was flawless. It is a small model, just over 3” in length.
Tamiya supplies weights or die cast hulls with many of their 1/48 amor kits, but not this one. Having a little heft to the model as you work on it helps, not to mention a little weight once it is on display. Without added weight, I doubt it weighs much more than an ounce.
 |
| Notice the 1" squares. The model is just over 3" long. |
Markings for only one vehicle are provided and that is a vehicle of the Polish 1st Armored Division in 1944. (See additional information below.)
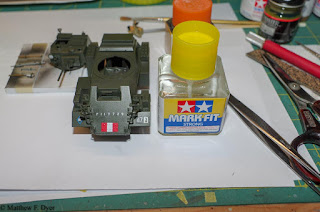
These were typical Tamiya decals which performed very well with the Mark Fit Strong. I have the regular strength, but on my aforementioned trip to Andy’s Hobby HQ he mentioned that he has had such good luck with “Strong” that he now only carries it. I can agree with him; the Strong worked very well with the Tamiya decals.
 |
| I have started putting a sheet of bond paper on the work surface. It helps coral small parts and also spills. |
The commander figure (very nicely detailed) was painted with Vallejo colors.
I have been spraying my models with Microscale Micro Satin which leaves a nice semi-gloss finish to apply decals over.
After the decals were applied, I sprayed another coat of Micro Satin on the model. Then I used a small bit of foam dipped in dark brown paint (and dabbed on a paper towel to absorb most of the paint) to add spots that look like mud and dirt on the vehicle.
Then, I used some brown Tamiya Panel Line Accent Color on the wheels and rims to make them look a bit used. And, finally, I applied via a brush a dusting of Tamiya Weathering Master Set A material to the vehicle to give it a dusty and used look. (I know I may sound like an ad for Tamiya, but their products always prove to be reliable, so why not use them where one can?)
I know my weathering is not as extensive (by far) as one sees in the magazines, but it looks fine to me.
Historical Information
 |
| This is a Mk. IV version, unit unknown. (Public Domain photo.) |
The Polish 1st Armored Division was attached to the First Canadian Army in Normandy. By August 1, 1944, they were fully deployed and played a huge role in sealing the Falaise Pocket and blocking numerous ferocious attacks by much larger German units seeking to break out. Surrounded and running out of ammunition, the Poles stopped several German divisions from escaping the trap. I am pleased that Tamiya picked markings for this gallant unit so I could add armor from that division to my growing armor collection. I always strive to model subjects with historical significance.
A final thought. If you have read my comments on other armor kits, I have often noted that I think American pioneer tools (shovels, axes, etc. secured to the vehicle) are painted OD like the rest of the vehicle. You can see above that the shovel on that Mk. IV was a different color than the handle. And, I painted the one on my model accordingly.
As always, thank you for visiting my blog. Comments are always welcome.


